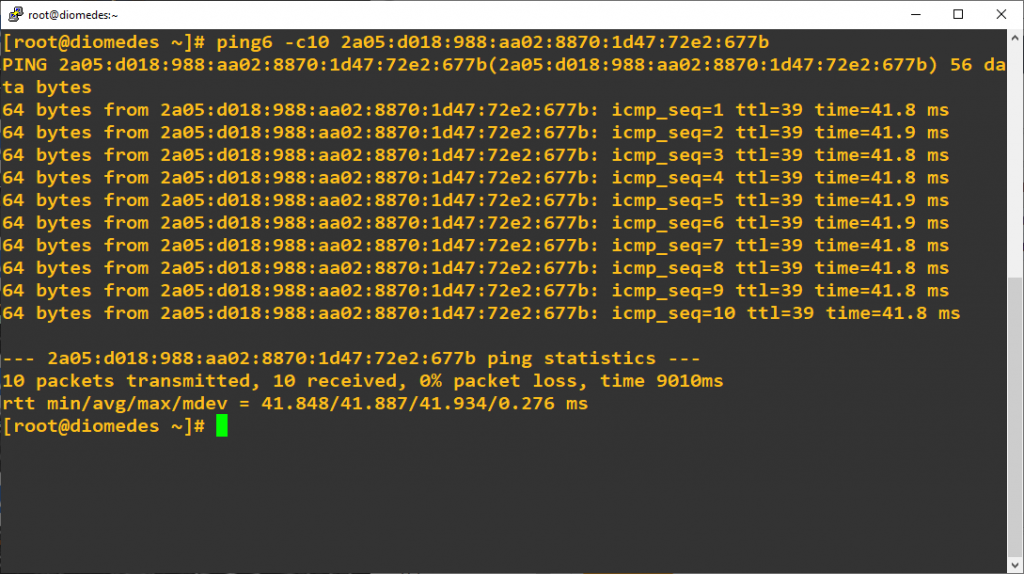
AWS VPC IPv6 config
Description
Amazon Virtual Private Cloud (Amazon VPC) allows to launch AWS resources into a virtual network. VPC is very flexible and allows different scenarios to be defined/implemented based on custom needs. It closely resembles a traditional network that is operated in classic data center, with the benefits of using the scalable infrastructure of AWS.
Lab Schema

Configs
1. Create VPC
Using AWS Console, select VPC service, next Your VPC and click "Create VPC"

2. VPC IP configuration
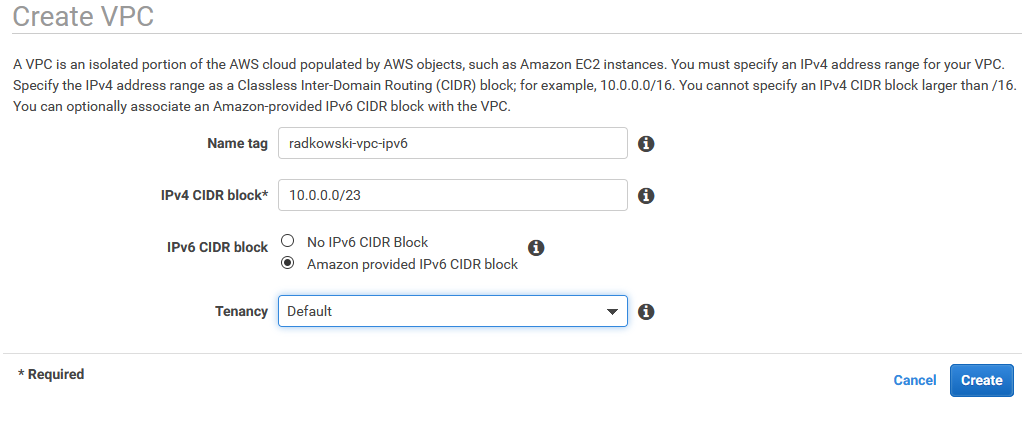
Enter VPC Name tag, IPv4 address pool and select "Amazon provided IPv6 CIDR". AWS will reserve ::/56 network for VPC which can be splitted into ::/64 and assigned to the subnets
3. Create subnets
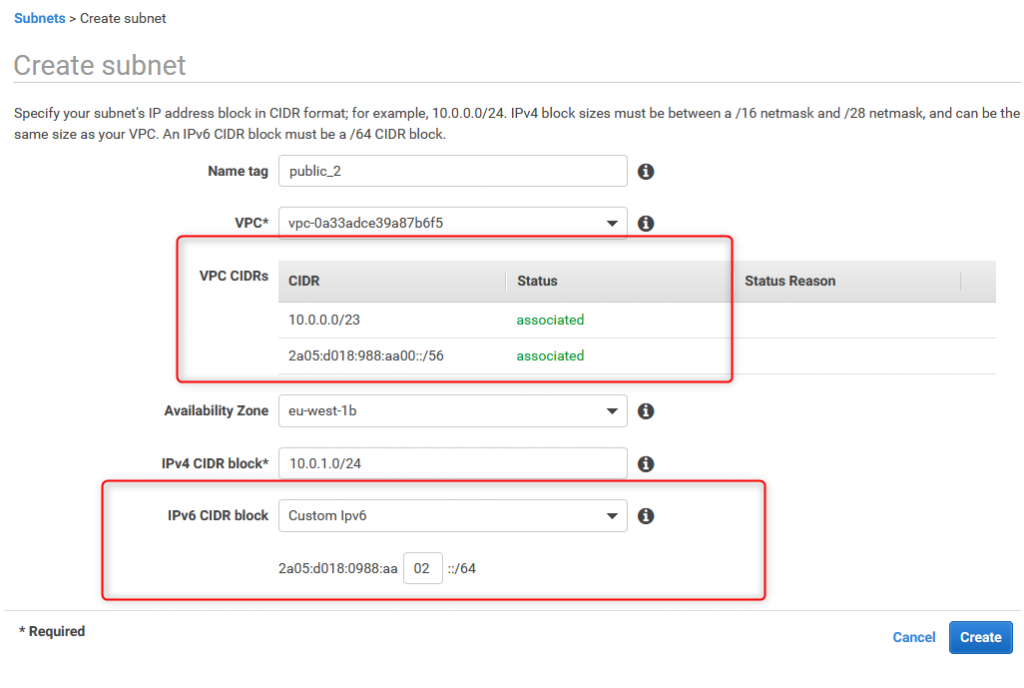
Using AWS console (VPC service) create two subnets

4. Create public_1 subnet
Create first subnet (public_1) based on following:
Name: public_1
VPC: VPC created in #1
IPv4:10.0.0.0/24
IPv6: Custom (enter two hexes to define ::/64 network)

5. Create public_2 subnet
Create first subnet (public_2) based on following:
Name: public_2
VPC: VPC created in #1
IPv4:10.0.1.0/24
IPv6: Custom (enter two hexes to define ::/64 network)
6. Set auto-assign IP settings
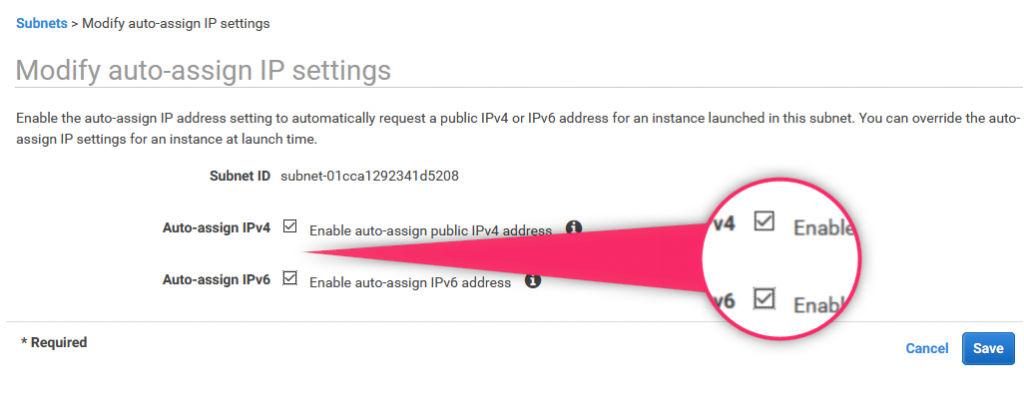
Subnets created in previous steps are not public, yet. To finish configuration process, IPv4 and IPv6 address auto-assign must be enabled

7. Enable auto-assign for IPv4 and IPv6
For both subnets defined above, enable IPv4 and IPv6 auto-assign option
8. Subnet verification
Verify, if both subnets has been configured correctly (auto-assign option)

9. Create Internet Gateway
Using AWS Console -> VPC service, create Internet Gateway

10. Configure Internet Gateway
Enter Name tag for IGW

11. Attach IGW to VPC (#1)
Use AWS Console to select "Attach to VPC" option for Internet Gateway

12. Attach IGW to VPC (#2)
Select previously created VPC to be attached to IGW
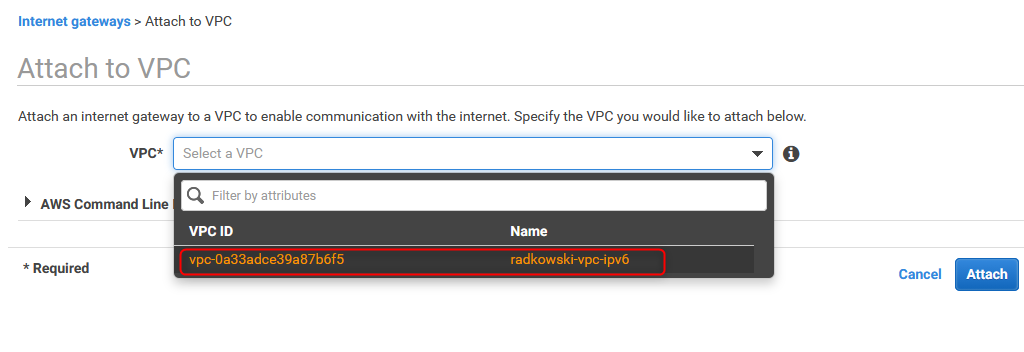
13. Verify Internet Gateway attachement
Using AWS Console verify, if IGW has been properly attached to VPC (it may take a while)

14. Create Security Group
Using AWS Console -> VPC service, create security group

15. Security group details
Enter security group details including:
- name
- description
- VPC

16. Define Security group inbound rules
Use Edit button to start editing inbound rules

17. Edit Inbound rules
Using console, enter rules to define allowed traffic

18. Verify security group rules
Using AWS console, verify Inbound Rules

19. Create route table
Using AWS console create route tables. In the example two route tables (one per each subnet) will be created

20. Create route table for public_1 subnet
Using AWS console create route table for public_1 subnet
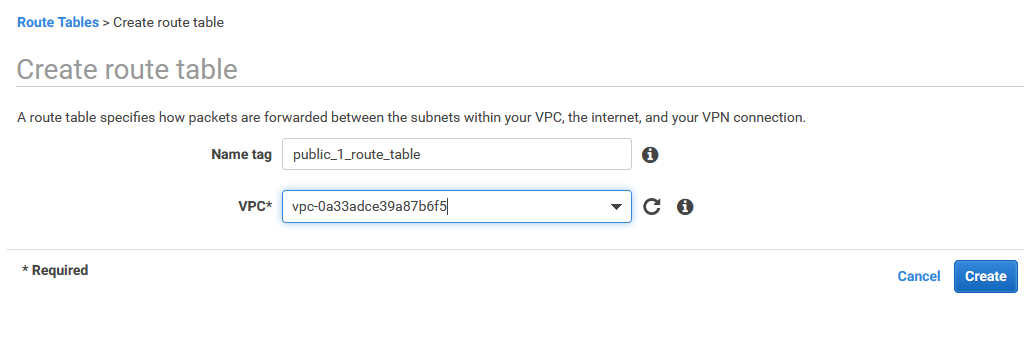
21. Create route table for public_2 subnet
Using AWS console create route table for public_2 subnet

22. Edit subnet associations for public_1
By default, all subnets are assocciated with the main route table. It can be changed by editing non-default route subnet associations

23. Select networks to be associated with public_1 route table
Different subnets can be associated with different route tables. In this example, pubic_1 will be associated with public_1_route_table
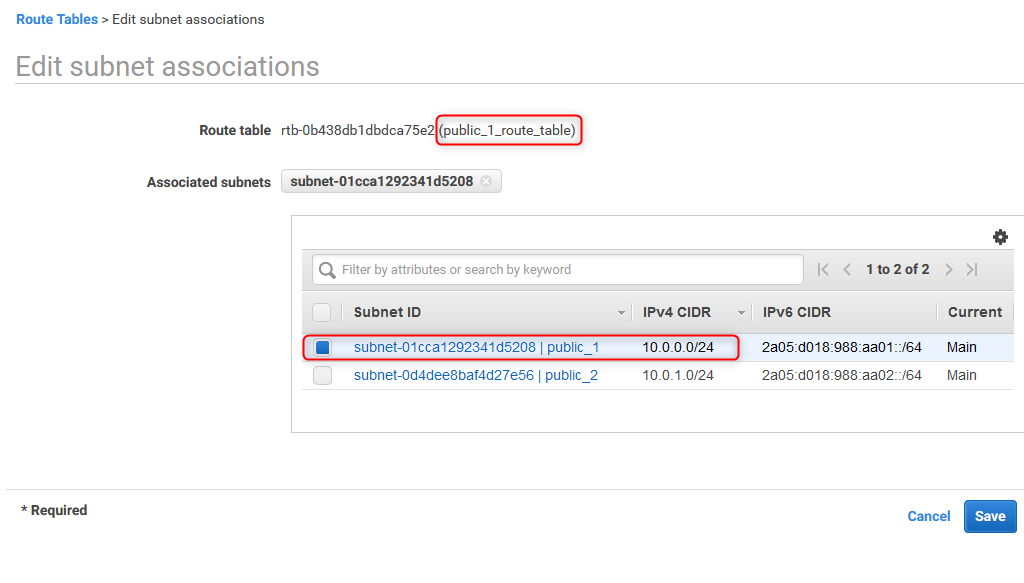
24. Select networks to be associated with public_2 route table
On following screen, pubic_2 will be associated with public_2_route_table

25. Modify routes
Routes need to be added/modified, to allow communication with others (non-local) networks/subnets,
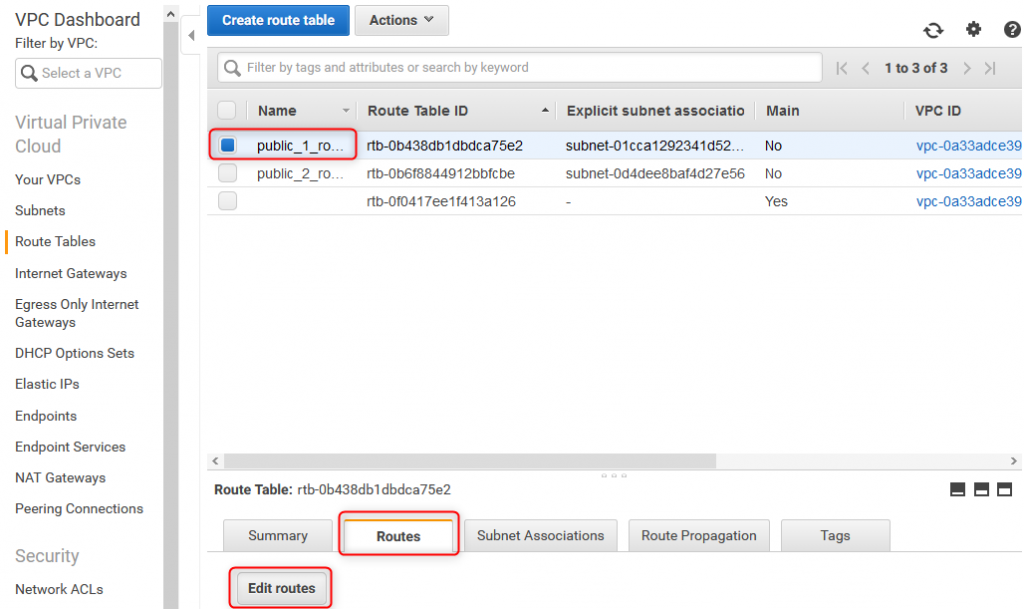
26. Add default route for both IPv4 and IPv6
0.0.0.0/0 means anywhere for IPv4, the same can be defined as ::/0 for IPv6 traffic. Both routes need to be configured using previously created Internet Gateway as a target.

27. Verify both routing tables
In both cases, default route for IPv4 and IPv6 should be passed via Internet Gateway

Test Area
28. Deploy first test EC2 instance
Deploy first test machine in public_1 subnet. Both public IPv4 and IPv6 will be assigned (based on subnet setting)

29. Deploy second test EC2 instance
Deploy first test machine in public_2 subnet. Both public IPv4 and IPv6 will be assigned (based on subnet setting)

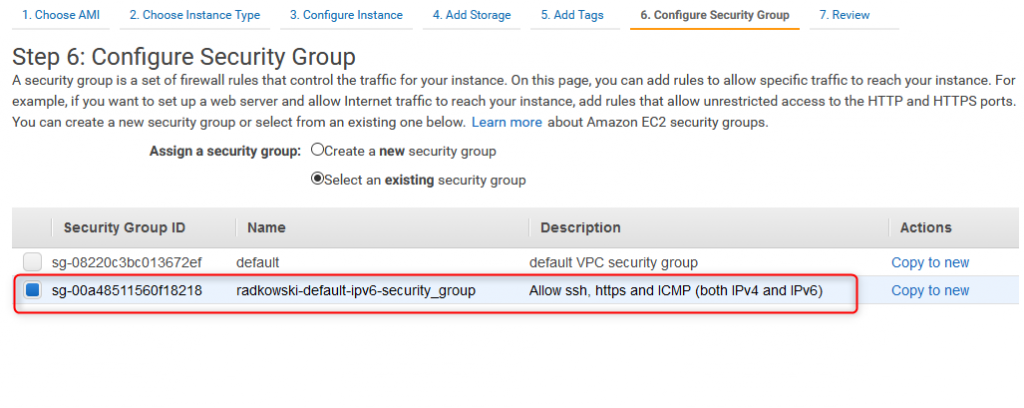
30. EC2 Security Groups
Assign to both created test EC2 instances, previously configured security groups
31. Verify IPv4 and IPv6 address
Verify, if both IPv4 and IPv6 has been properly assigned to each instance

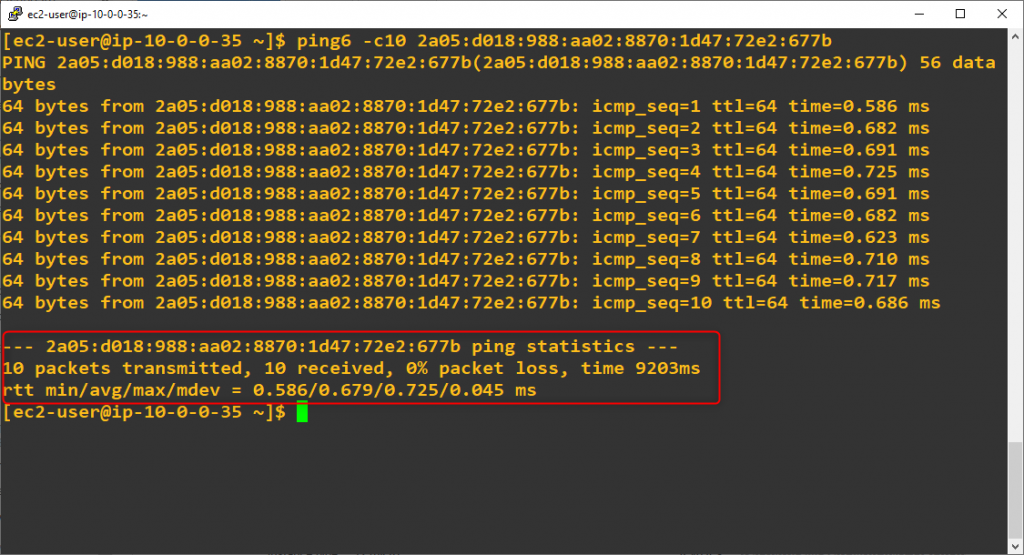
32. Check IPv6 conectivity (inside VPC)
Execute ping6 command from first to second test EC2 instance
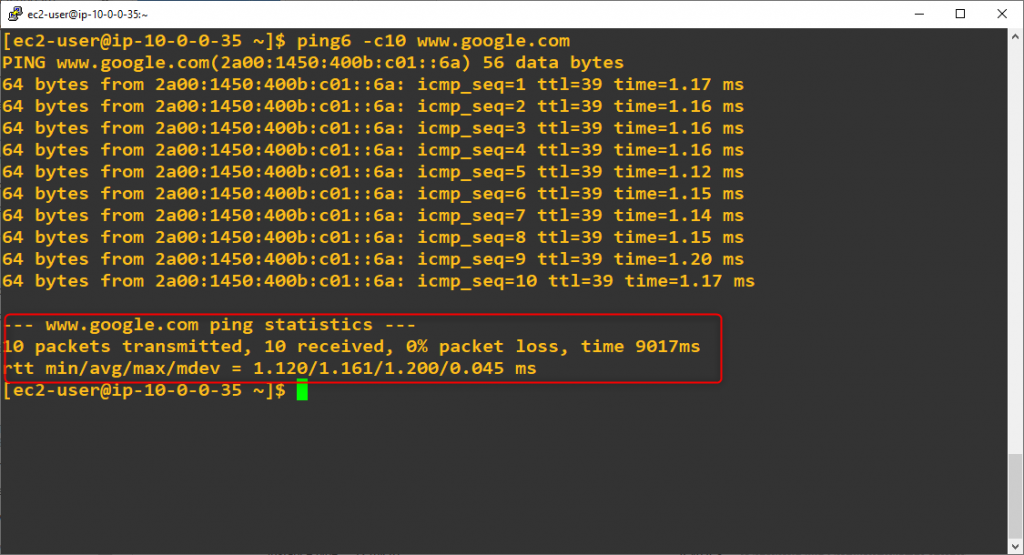
33. Check IPv6 conectivity (AWS -> Internet)
Execute ping6 command from first EC2 instance to external address (www.google.com)
34. Check IPv6 conectivity (Internet -> AWS)
Execute ping6 command from external location to EC2 instance
