Transit Gateway Connect Attachment
Description
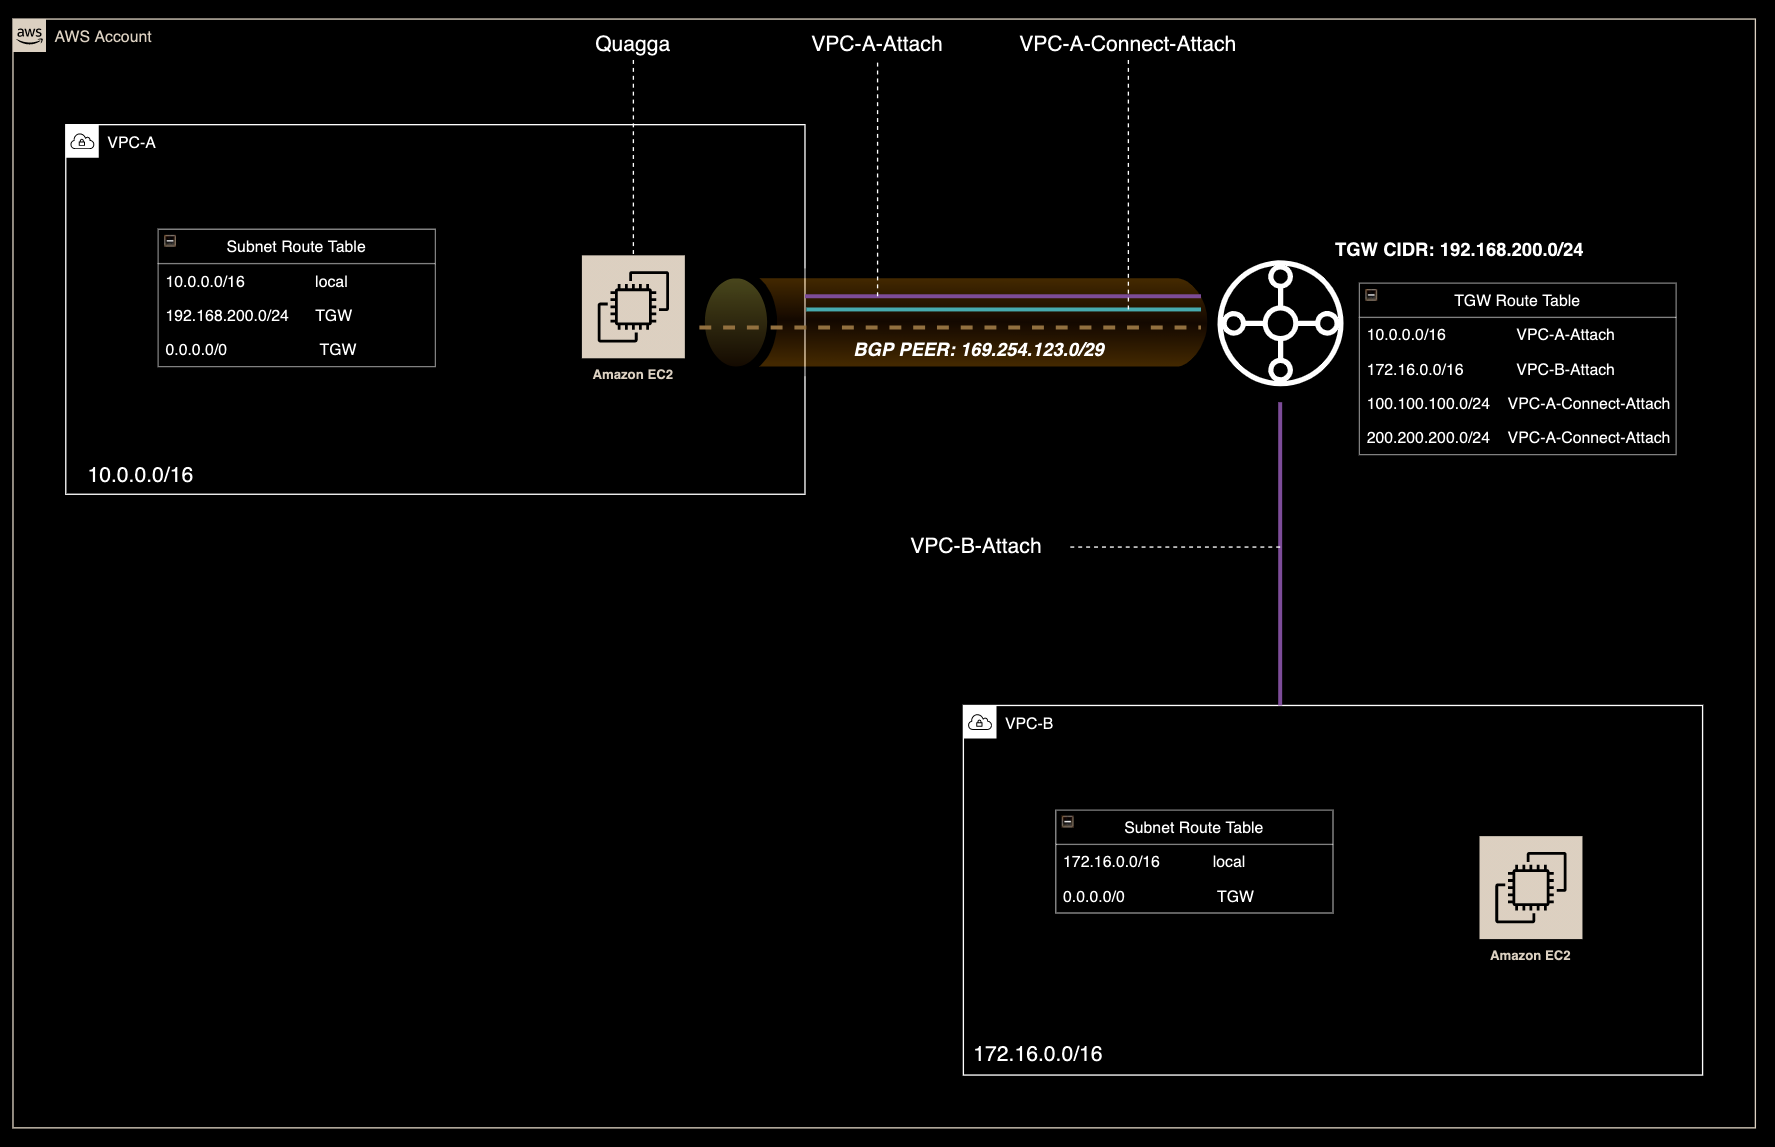
In 2019 AWS introduced Transit gateway Connect attachment. It allows to establish a connection between a transit gateway and third-party virtual appliances (such as SD-WAN appliances) running in a VPC. A Connect attachment supports the Generic Routing Encapsulation (GRE) tunnel protocol for high performance, and Border Gateway Protocol (BGP) for dynamic routing. Once created, one or more GRE tunnels can be deployed (also referred to as Transit Gateway Connect peers). To exchange routing information, two BGP sessions over the GRE tunnel are supported.
A Connect attachment uses an existing VPC or AWS Direct Connect attachment as the underlying transport mechanism. This is referred to as the transport attachment. The transit gateway identifies matched GRE packets from the third-party appliance as traffic from the Connect attachment. It treats any other packets, including GRE packets with incorrect source or destination information, as traffic from the transport attachment.
Initial Config
To implement following solution, you need to create two VPCs based on following:
- VPC-A (10.0.0.0/16)
- Subnet-A (10.0.0.0/24)
- VPC-B (172.16.0.0/16)
- Subnet-B (172.16.0.0/24)
To deploy VPCs in automated way, use CloudFormation script
Config - TGW (#1)
1.Create Transit Gateway
Create Transit Gateway, provide dedicated CIDR which will be used to configure GRE tunnel.
4.Create Connect Attachment
Create new attachment - select Connect as type and attachment created in step #2 as a transport.
5.Update/confirm association
Check the TGW route table if all attachments created in steps 2-5 have been associated successfully. If not, associate missing attachments.
6.Update/confirm propagation
Check the TGW route table if all attachments created in steps 2-5 have been propagated successfully. If not, propagate missing attachments.
7.Confirm routes
Check if both routes have been properly added to the TGW routing table. Both should be added as 'propagated' with status 'active'
8.Update VPC-A routing table
Add route to CIDR created in step #1 via Transit Gateway

9.Deploy EC2
Create a new EC2 that will be used to install Quagga. The instance must be deployed in VPC-A. Record Instance private IP
Config - Quagga (#1)
Config - TGW (#2)
12.Provide new peer details
To create a new peer you need to provide the following:
- peer address: IP address from step #9
- BGP inside CIRR block: any /29 network from 169.254.0.0/16
- Peer ASN: as following scenario configures eBGP, provide ASN different than configured in step #1
Config - Quagga (#2)
14.Copy config files
Copy and rename sample config files into quagga directory:
sudo cd /usr/share/doc/quagga-0.99.22.4
sudo cp ./zebra.conf.sample /etc/quagga/zebra.conf
sudo cp ./bgpd.conf.sample /etc/quagga/bgpd.conf
15.Enable/start services
Use systemctl commands to enable zebra and bgpd services
sudo systemctl enable --now zebra
sudo systemctl enable --now bgpd
sudo systemctl status zebra
sudo systemctl status bgpd
16.Create GRE tunnel
Use ip tool to establish gre tunnel. Use data recorded in step #13
sudo ip tunnel add To-TGW mode gre remote 192.0.200.237 local 10.0.0.80 ttl 255
sudo ip link set To-TGW up
sudo ip addr add 169.254.123.1/29 dev To-TGW
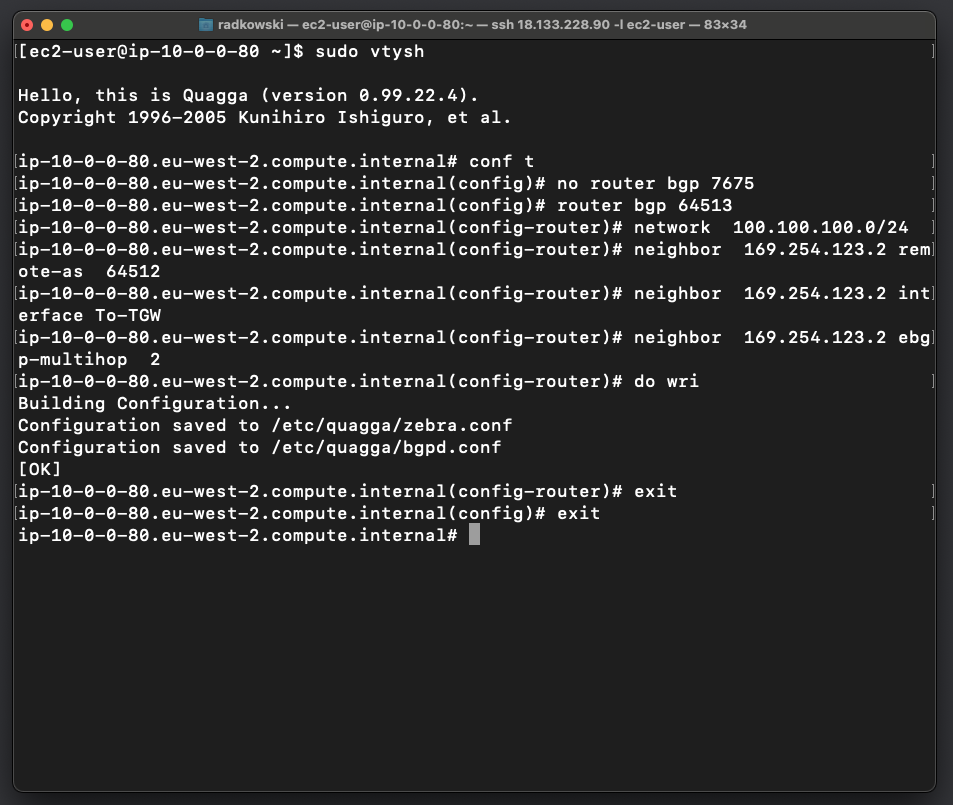
17.Configure BGP - neighbor #1
Use quagga build-in tool vtysh to configure BGP router and first neighbor. Add extra network (in this scenario 100.100.100.0/24) which sill be propagated to TGW
sudo vtysh
quagga# conf t
quagga(config)# no router bgp 7675
quagga(config)# router bgp 64513
quagga(config-router)# network 100.100.100.0/24
quagga(config-router)# neighbor 169.254.123.2 remote-as 64512
quagga(config-router)# neighbor 169.254.123.2 interface To-TGW
quagga(config-router)# neighbor 169.254.123.2 ebgp-multihop 2
quagga(config-router)# do wri
quagga(config-router)# exit
quagga(config)# exit
quagga#
18.Confirm BGP state - neighbor #1
Use quagga build-in tool vtysh to configure if BGP session has been established
sudo vtysh
quagga# sh ip bgp neighbour
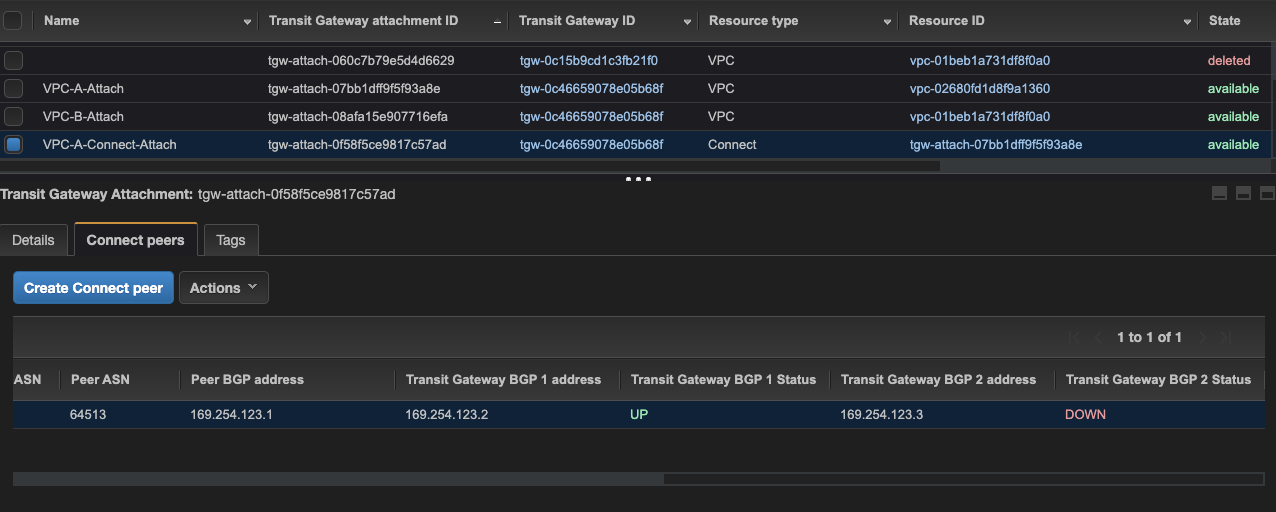
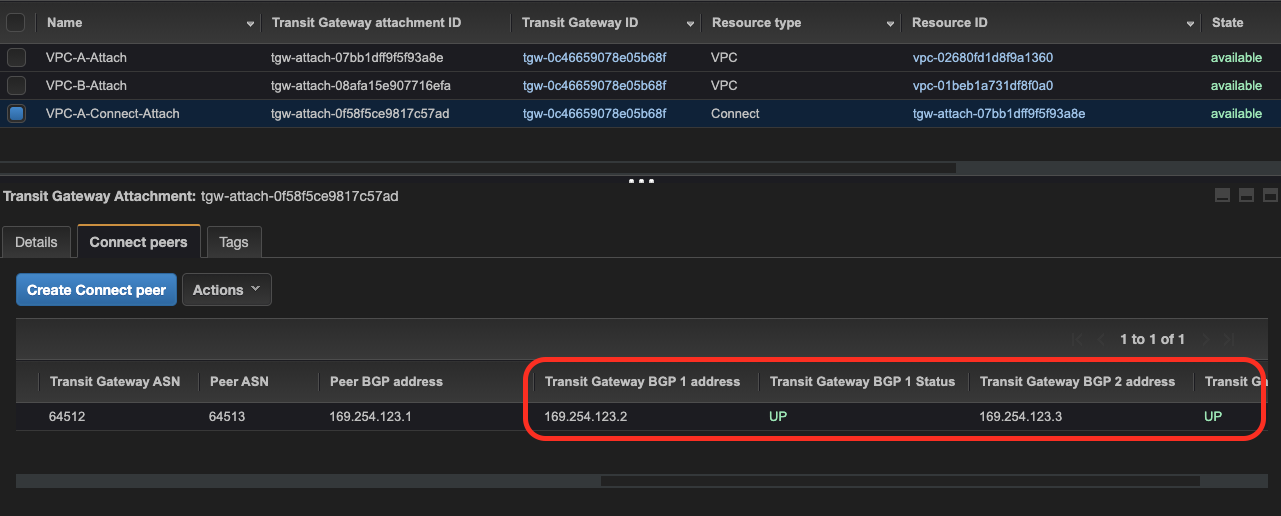
19.Confirm BGP state via AWS Console - neighbor #1
Using AWS Console (Connect peer view) confirm that BGP for first IP address is in UP state
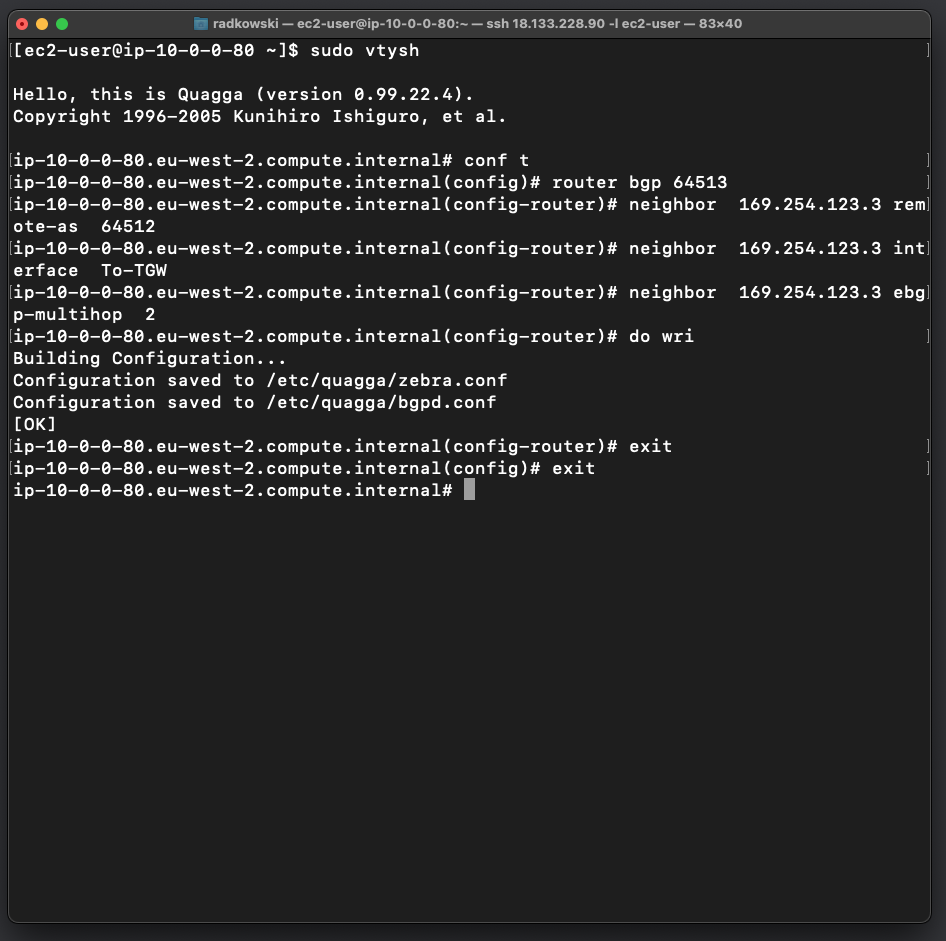
20.Configure BGP - neighbor #2
Use quagga build-in tool vtysh to configure second neighbor
sudo vtysh
quagga# conf t
quagga(config)# router bgp 64513
quagga(config-router)# neighbor 169.254.123.3 remote-as 64512
quagga(config-router)# neighbor 169.254.123.3 interface To-TGW
quagga(config-router)# neighbor 169.254.123.3 ebgp-multihop 2
quagga(config-router)# do wri
quagga(config-router)# exit
quagga(config)# exit
quagga#
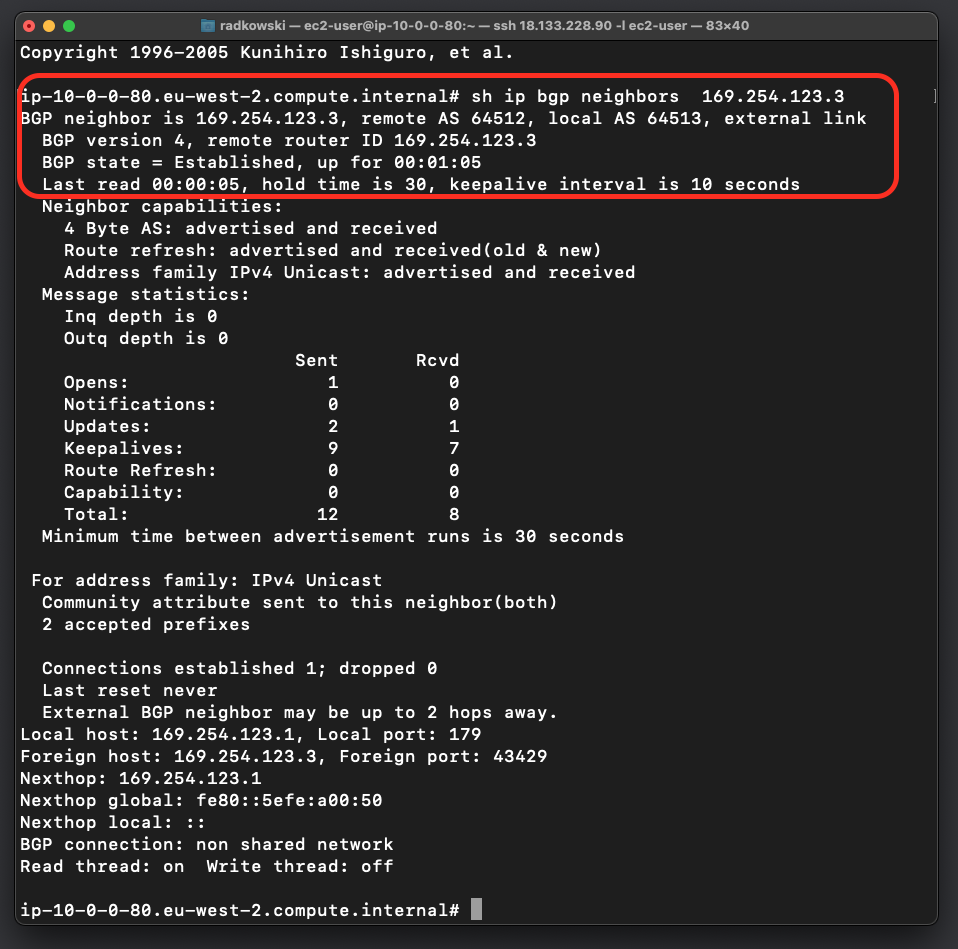
21.Confirm BGP state - neighbor #2
Use quagga build-in tool vtysh to configure if BGP session has been established
sudo vtysh
quagga# sh ip bgp neighbor 169.254.123.3
Test Area
22.Confirm BGP state via AWS Console - neighbor #2
Using AWS Console (Connect peer view) confirm that both BGP sessions are in UP state
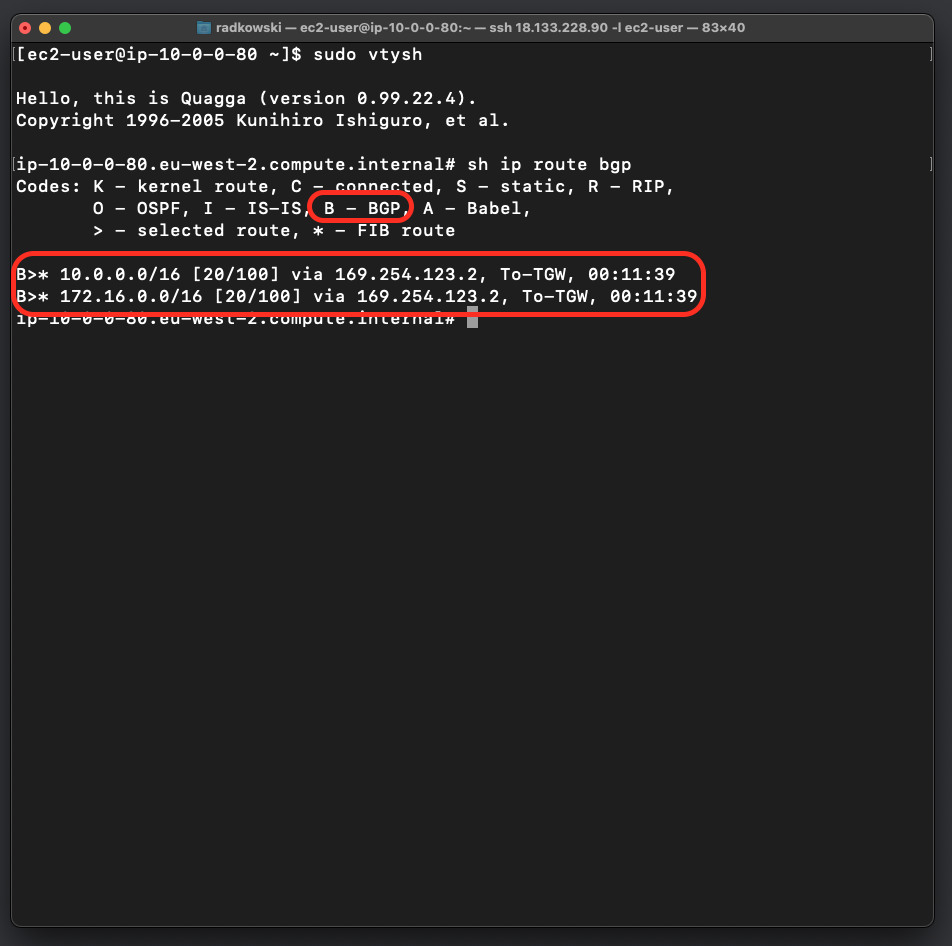
23.Confirm BGP routes - Quagga
Use quagga build-in tool vtysh to check all BGP routes
sudo vtysh
quagga# sh ip route bgp
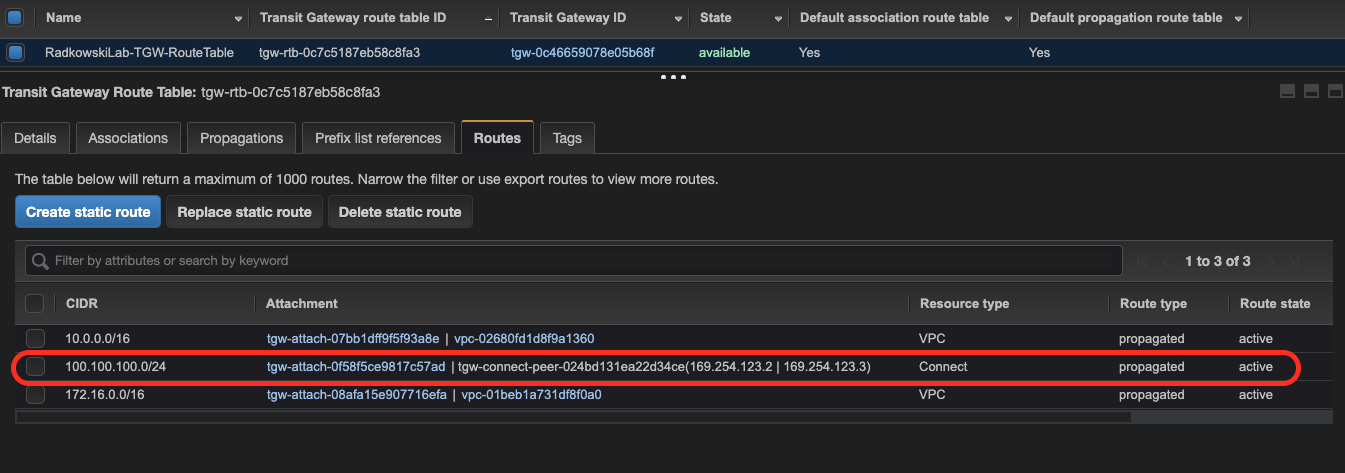
24.Confirm BGP routes - TGW
Using AWS Console check if route 100.100.100/0 added in step #17 has been properly propagated in TGW route table
25.Create new route - Quagga
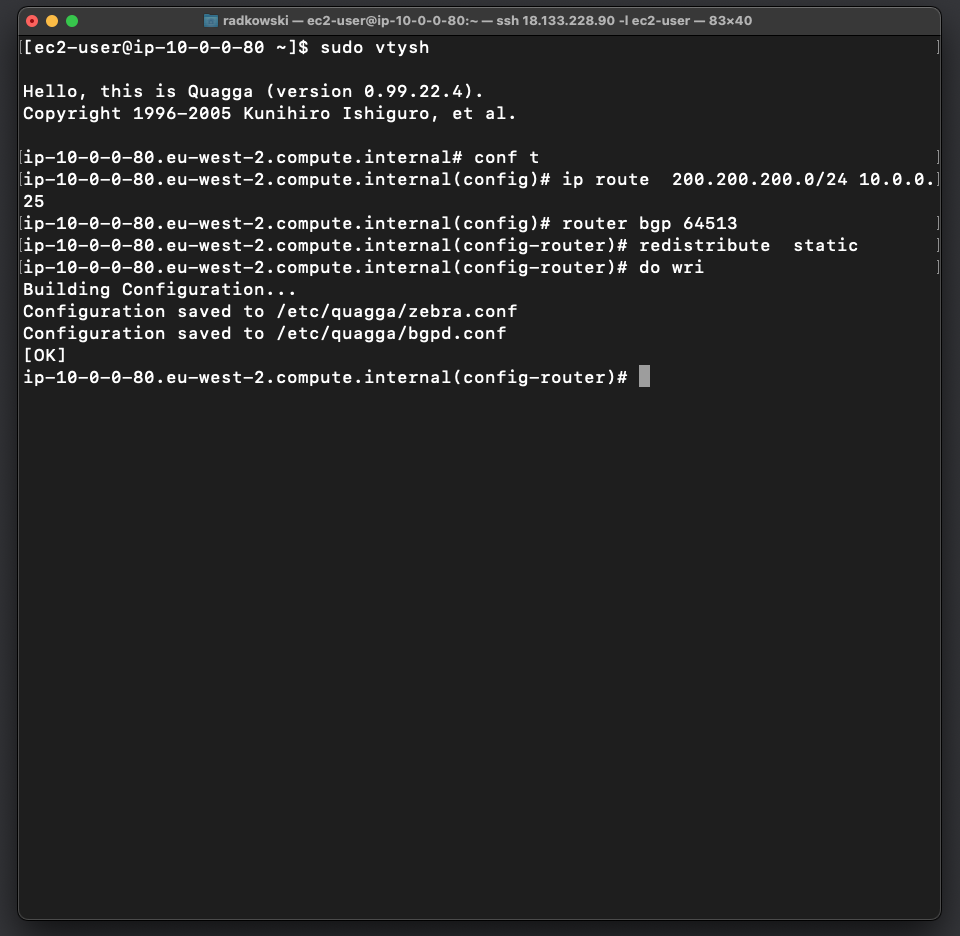
Using vtysh tool add static network (200.200.200.0/24). next add it to BGP router to be redistributed
sudo vtysh
quagga# conf t
quagga (config)# ip route 200.200.200.0/24 10.0.0.25
quagga(config)# router bgp 64513
quagga(config-router)# neighbor redistribute static
quagga(config-router)# do wri
quagga(config-router)# exit
quagga(config)# exit
quagga#
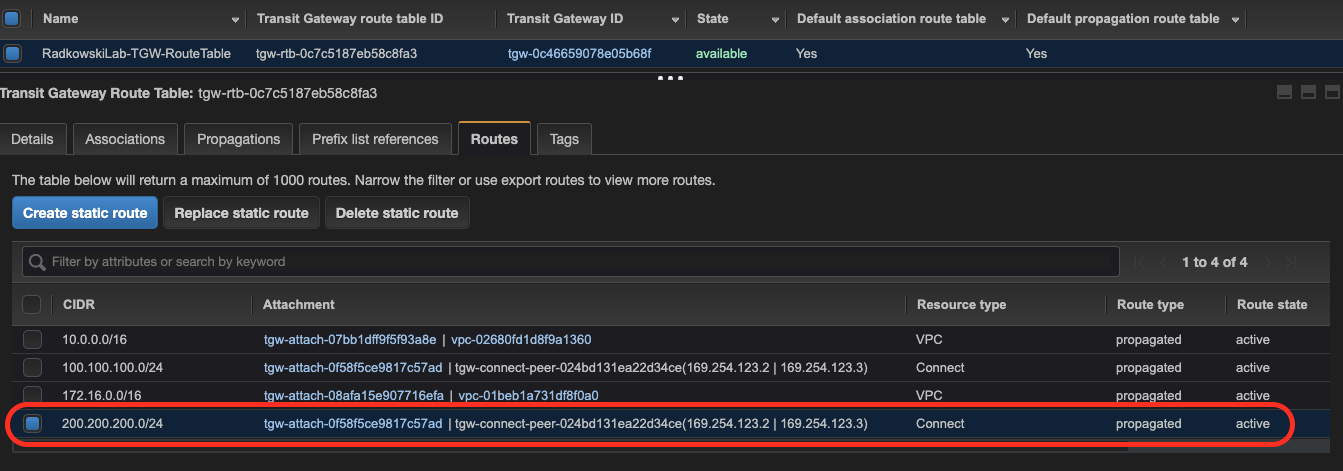
26.Confirm static route propagation
Using AWS Console confirm if the static route is visible in TGW route table

