Code Signing for Lambda
Description
AWS Signer is a fully managed code-signing service to ensure the trust and integrity of a code. Organizations validate code against a digital signature to confirm that the code is unaltered and from a trusted publisher. With AWS Signer, security administrators have a single place to define the signing environment, including what AWS Identity and Access Management (IAM) role can sign code and in what regions. AWS Signer manages the code-signing certificate public and private keys and enables central management of the code-signing lifecycle.
Solution Schema
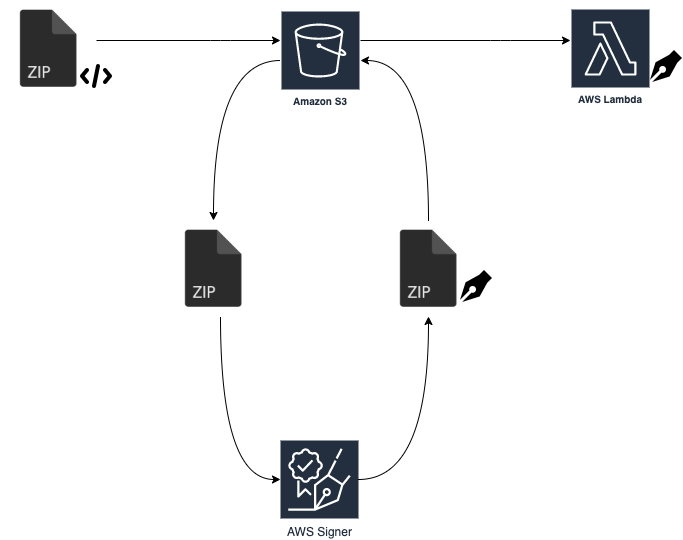
Configs - Lambda (#1)
1.Lambda code
Create simple lambda and save it in lambda_function.py file
def lambda_handler(event, context):
    print ('\n\n****************************')
    print ("Hi, I'm Lambda")
    print ("more interesting stuff can be found at https://www.radkowski.pro/howtos")
    print ('\n\n****************************')
2.Lambda zip file
Create zip package

Configs - S3 (#1)
3.Create S3 Bucket
Using AWS S3 Console, create S3 bucket to store ziped code

4.Upload ziped Lambda
Upload zip file created in step #2

5.Lambda S3 URI
Using object overview tab, copy object S3 URI

Configs - AWS Signer
6.Signing Profile
Using AWS Console, open AWS Signer. Next, create new Signing Profile
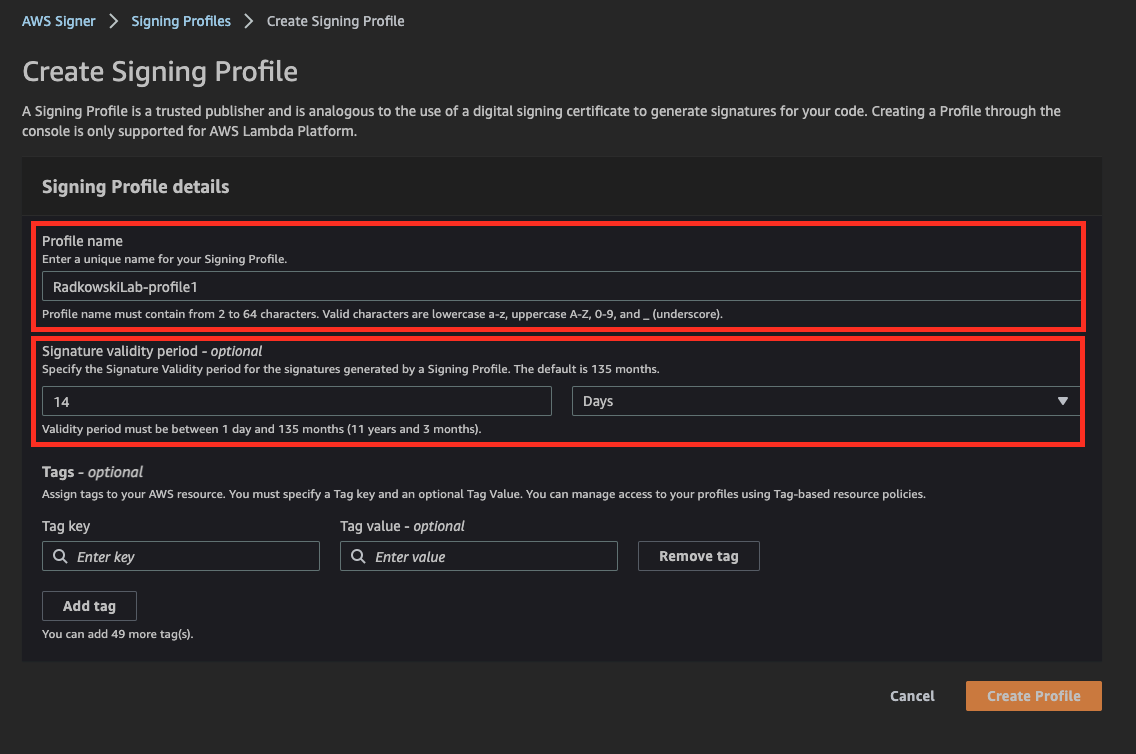
7.Signing Job (#1)
Open AWS Signer Console, create a new Signing Job. Provide information about source lambda zip S3 URI (captured in step #5), lambda version, and destination S3 bucket/folder.
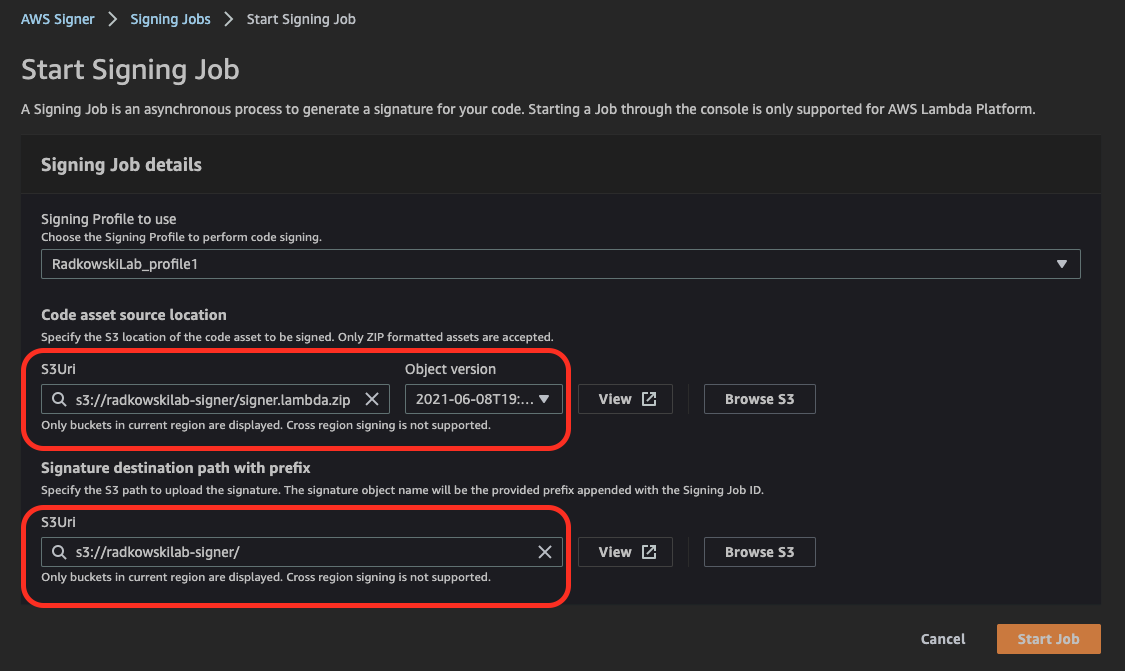
8.Signing Job (#2)
Oncej ob started, you should see status In Progress

9.Signing Job (#3)
Status Succeeded confirms, that lambda has been signed successfully.

Configs - S3 (#2)
10.Siged Lambda (#1)
Come back to S3 Console. You should see another file that represents the signed Lambda zip file.

11.Siged Lambda (#2)
Collect Signed Lambda object URL

Configs - Lambda (#2)
12.Signing Configuration
Use AWS Console to select Lambda service. nest select Code signing Configuration to create a new config. Select Signing Profile created in step #6 as well as prefered validation policy.
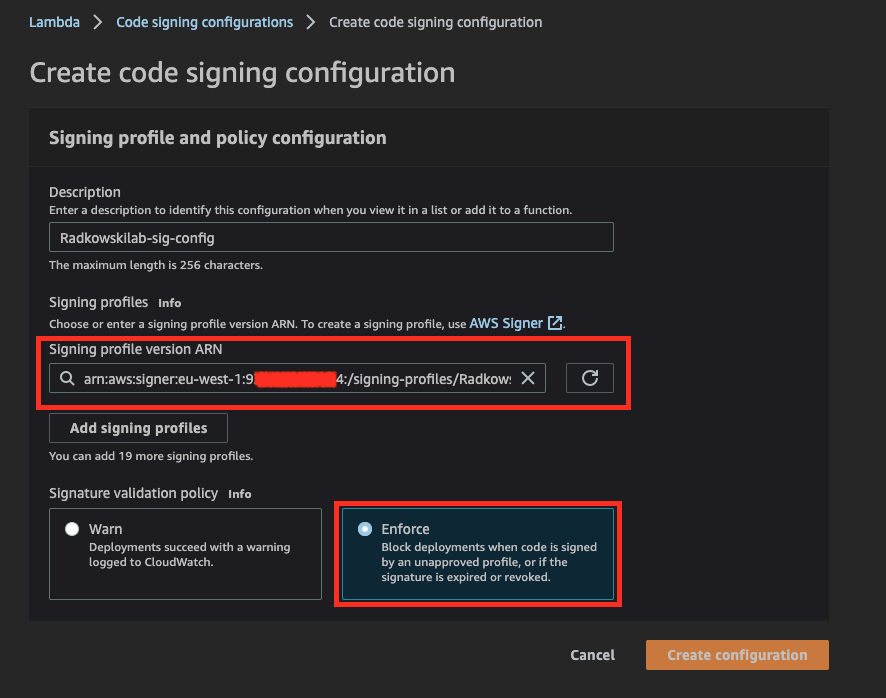
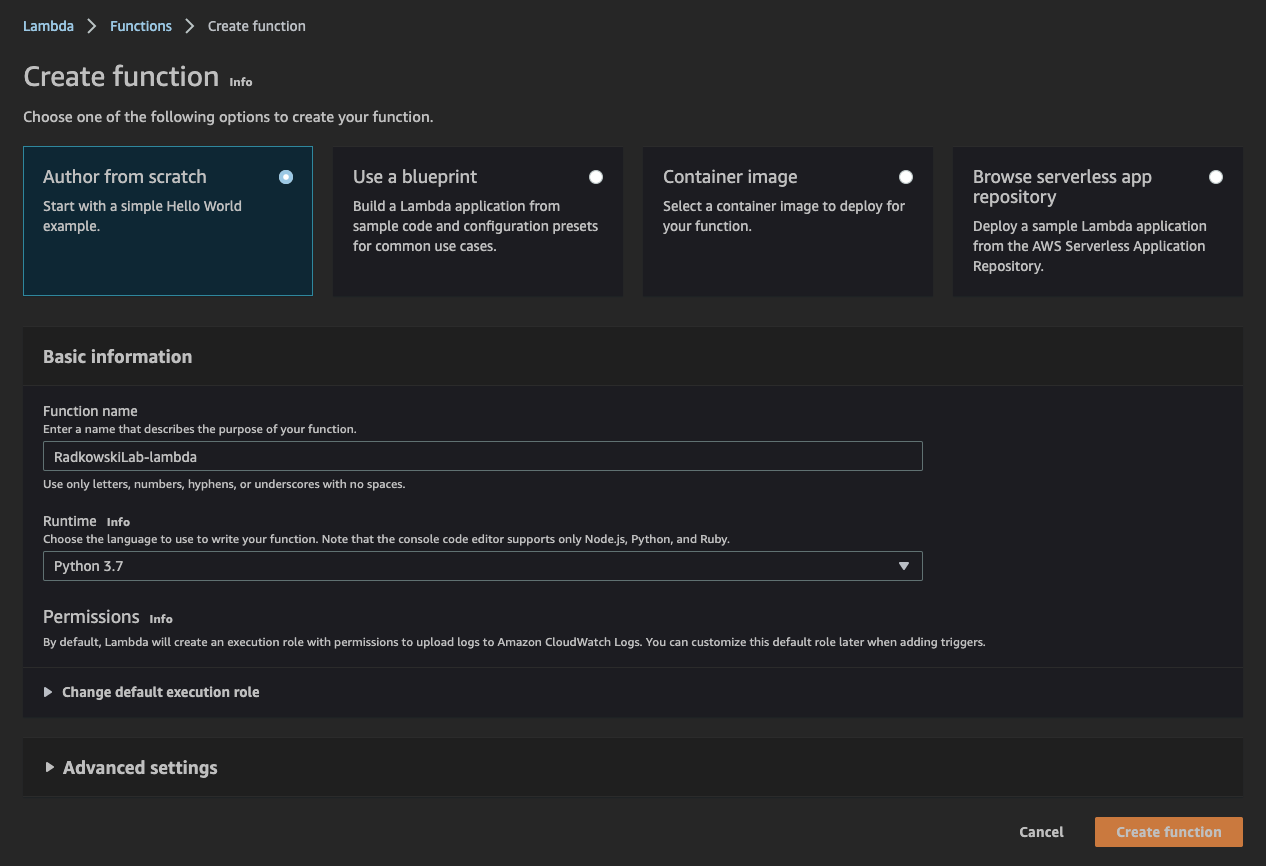
13.Create new Lambda function
Using Lambda Console, create new Lambda (Author from scratch).
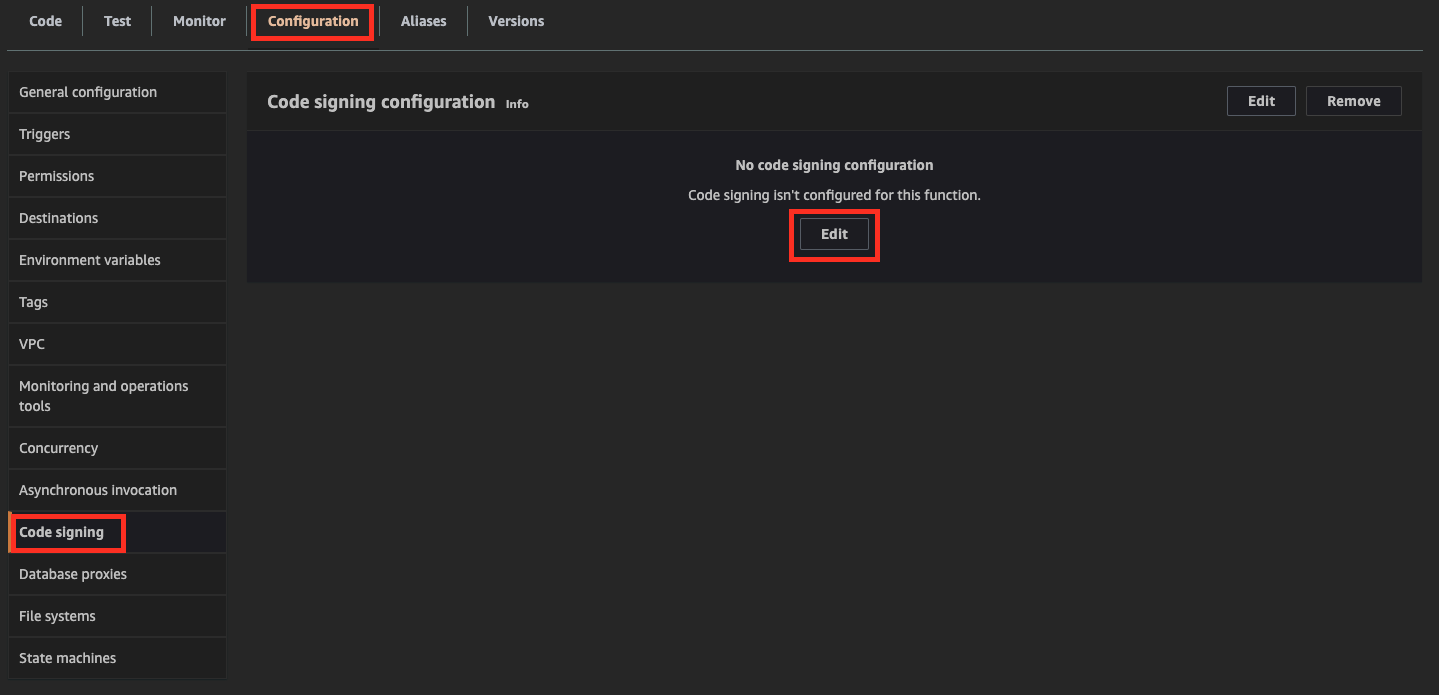
14.Enable Code Signing (#1)
Update configuration for previously created lambda - edit Code Signing section
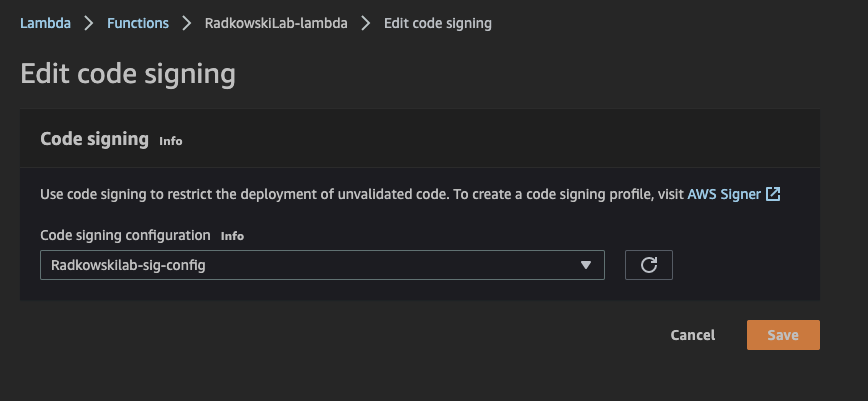
15.Enable Code Signing (#2)
Select Code Signing Configuration created in step #12
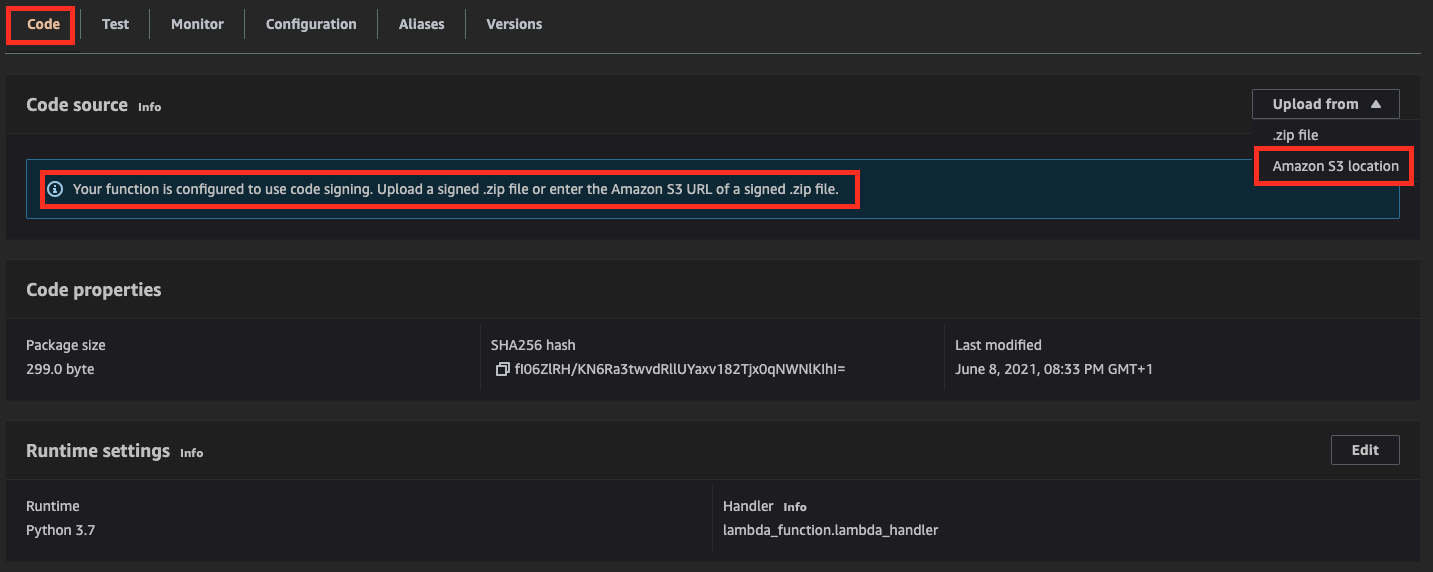
16.Enable Code Signing (#3)
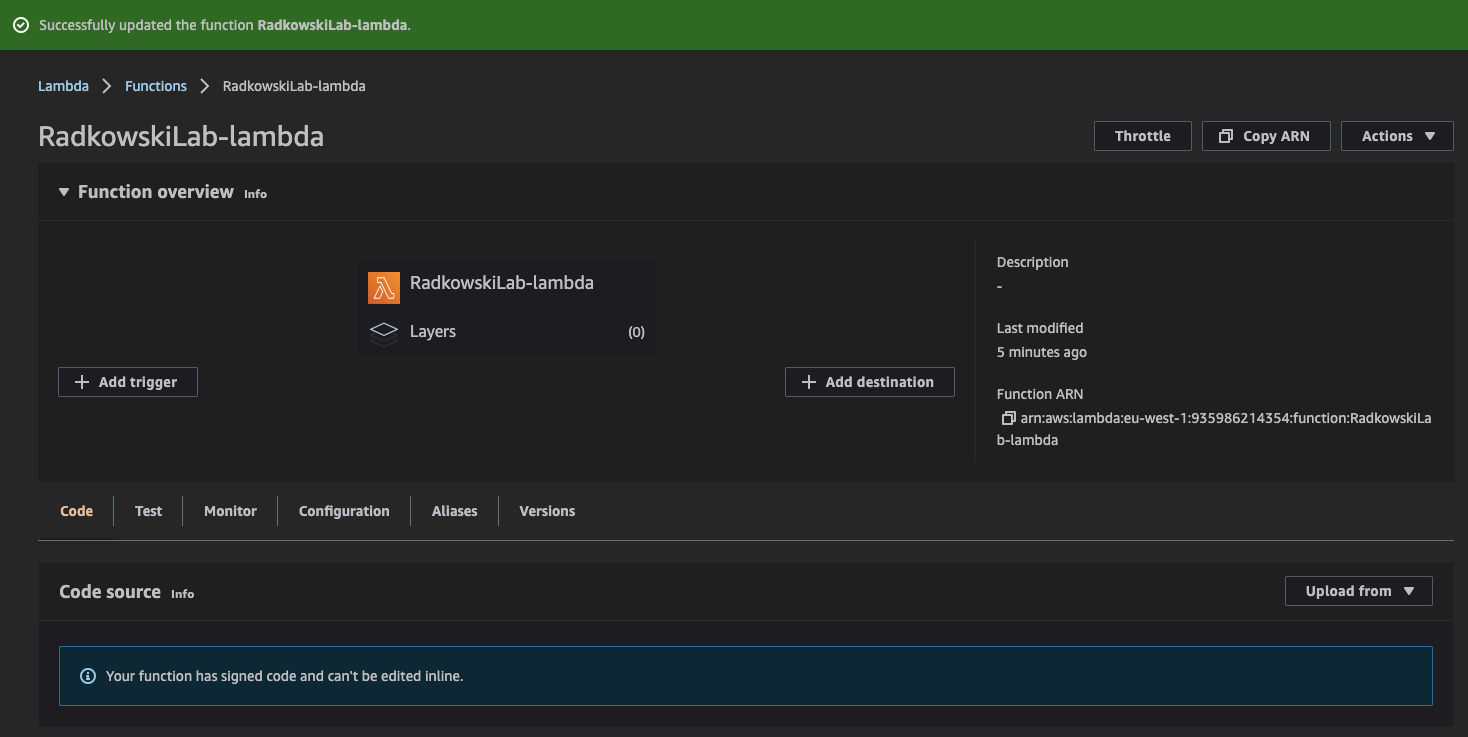
Come back to Lambda settings and upload the signed lambda zip file captured in step #11. Bear in mind, that you will not be able to modify lambda code directly, as it's already configured to use code signing.
17.Upload signed lambda
Lambda has been uploaded successfully. As it has been signed, inline editing is no longer available.
Test Area
18.Signed lambda test
Using Lambda Console, execute the test to confirm that Lambda works as expected.

19.Nonsigned lambda test
As validation policy (step #12) has been set to Enforce, try to upload non signed lambda will fail.

