CloudFront + Lambda@Edge + AzureAD
Description
The following lab explains how to integrate CloudFront with Lambda@Edge to provide authorization via AzureAD. Destination resources are located in S3 bucket available via CloudFront using custom domain configured in Route 53 and protected by certificates issued by AWS Certificate Manager.
Lab Schema
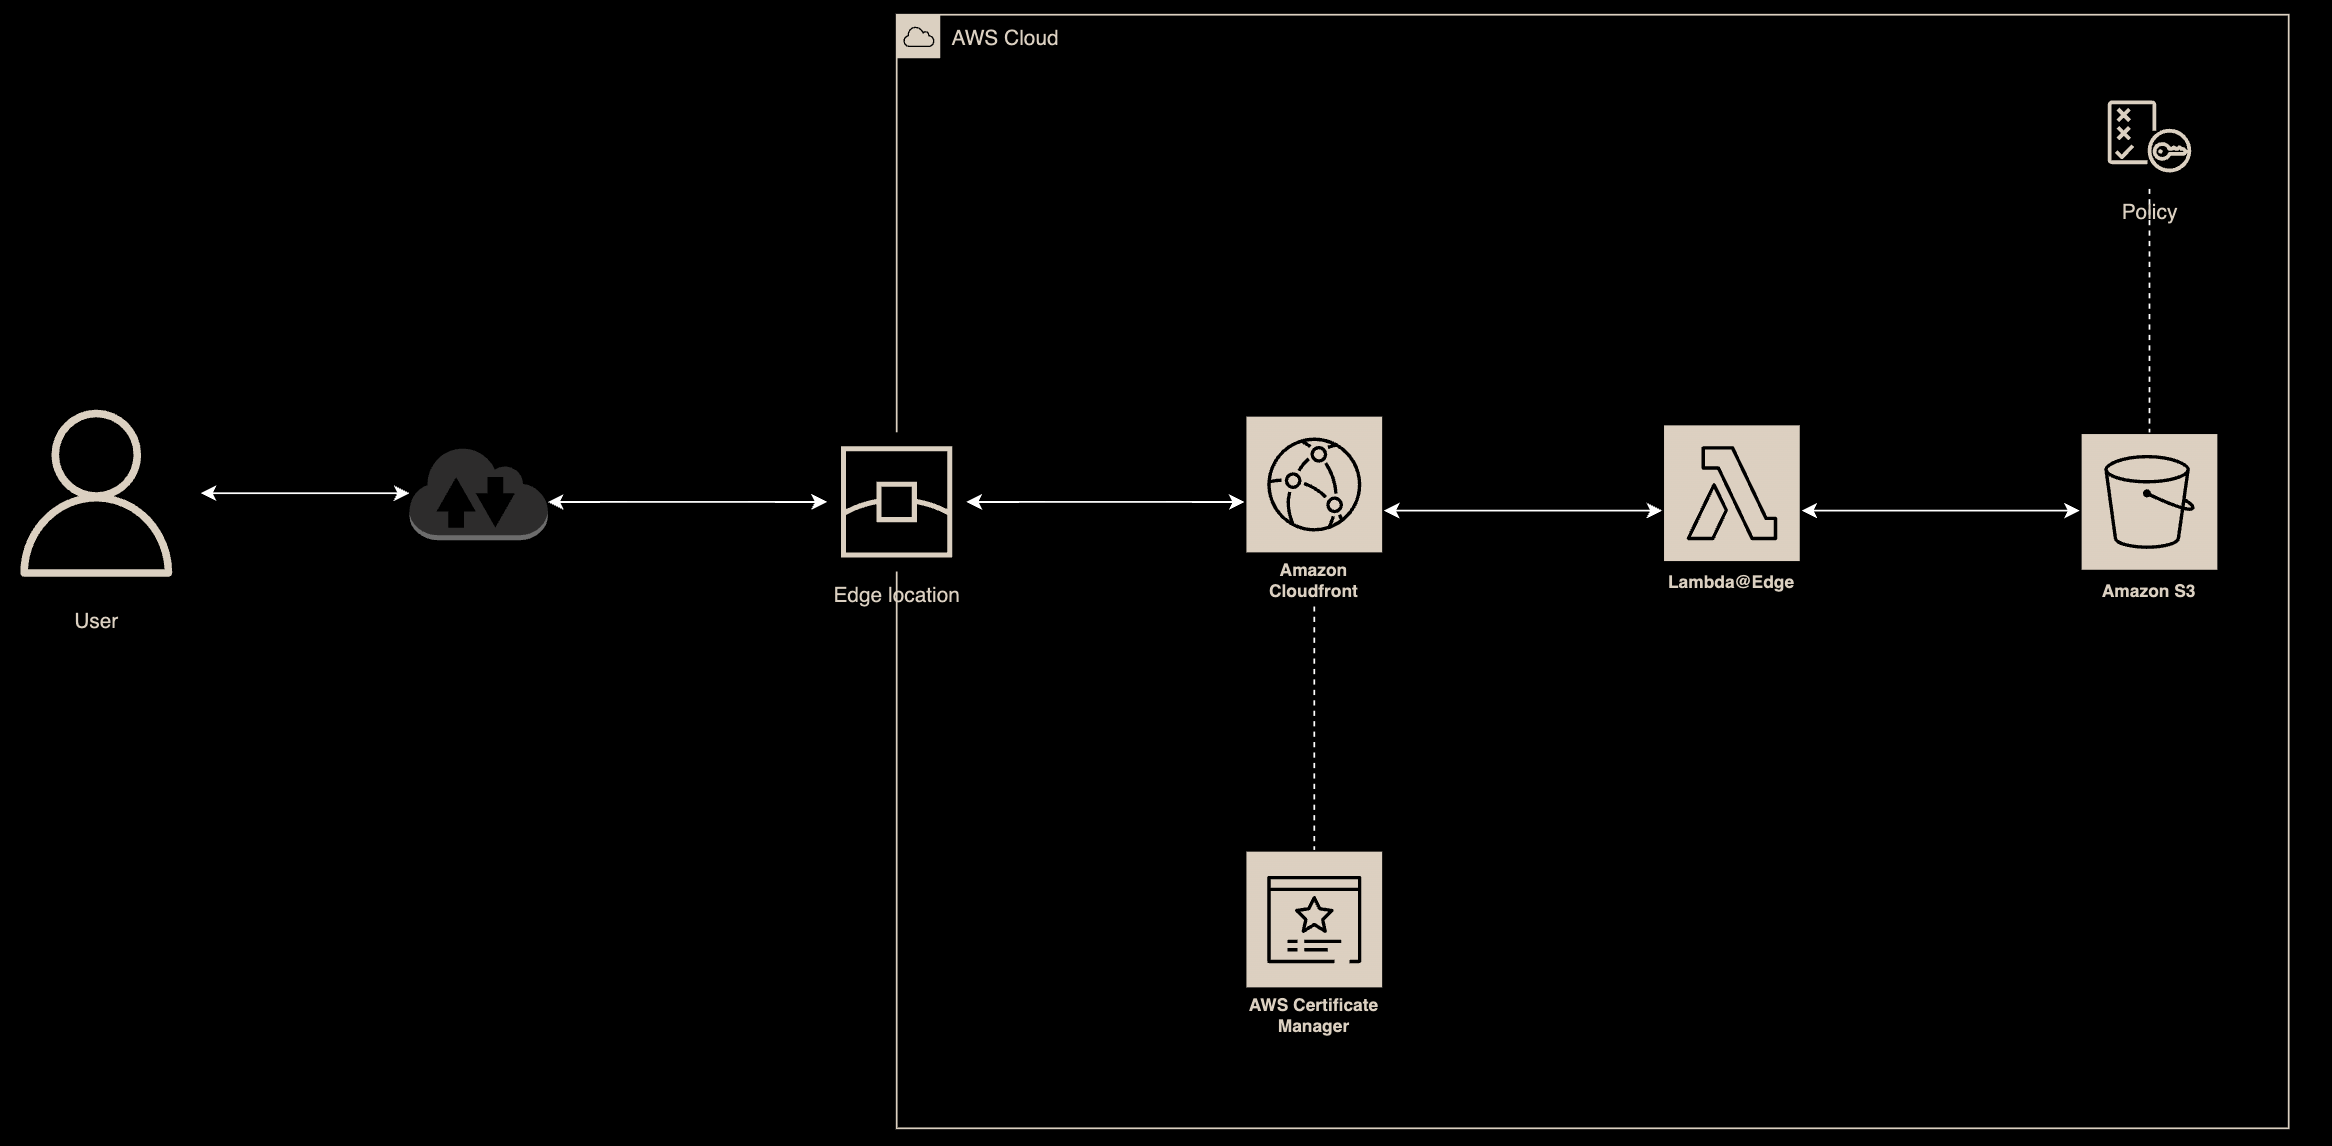
Config - S3 (#1)
1.Create S3 Bucket
Using AWS Console, create S3 bucket

2.Upload content
Propagate bucket with some content (I was using a free template available here: Free Templates )

Config - Route53 (#1)
3.DNS Config (#1)
Create Public Hosted Zone in Route53

4.DNS Config (#2)
Check that the previously created zone is visible globally (I was using DNSChecker)

Config - AWS Certificate Manager (#1)
5.Certificate Config (#1)
Go to ACM and request a public certificate

6.Certificate Config (#2)
Enter FQDN and select DNS (preferred) validation method

7.Certificate Config (#3)
Confirm if certificate is in pending state (waiting to be validated)

8.Certificate Config (#4)
Using the integration between ACMN and Route53 you can create a validation record using a single button (Create records in Route 53)

9.Certificate Config (#5)
Create validation record

10.Certificate Config (#6)
Confirm validation record has been created successfully
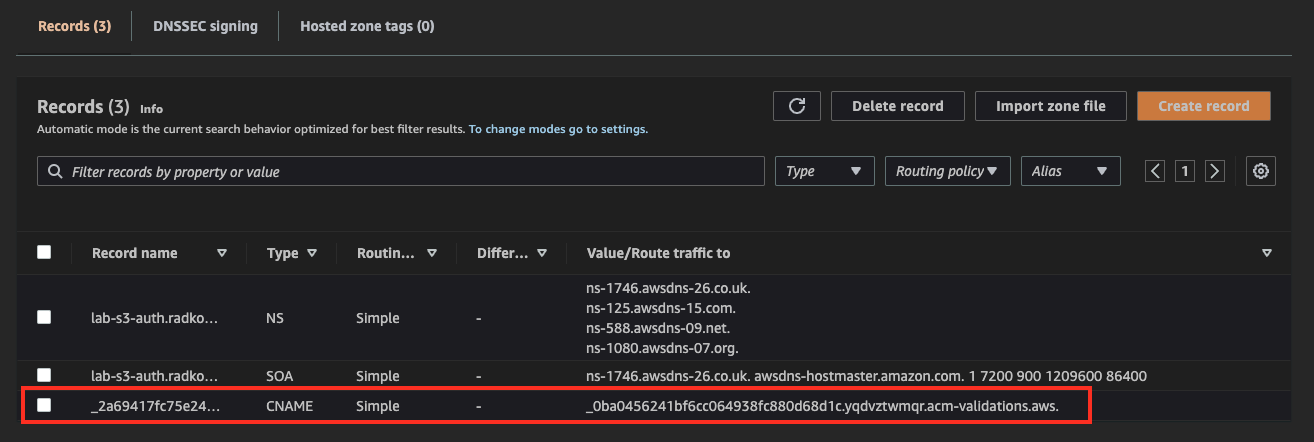
11.Certificate Config (#7)
Check certificate status in ACM. After positive validation, a certificate should be issued.

Config - CloudFront
12.CloudFront Configuration (#1)
Using CloudFront Console, create new Distribution. Select S3 bucket created in step #1 as Origin. Create new OAI, allow CloudFront to update S3 bucket policy acordingly.
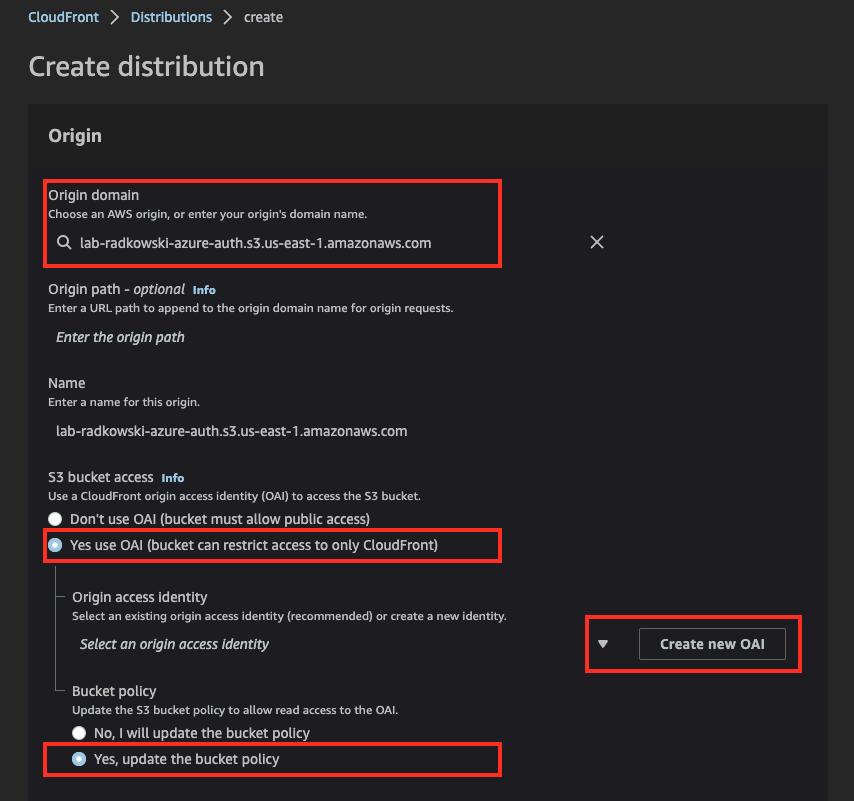
13.CloudFront Configuration (#2)
Provide domain created in step #3 as alternative domain, select custom certificate issued in step #11 and confirm default Security policy
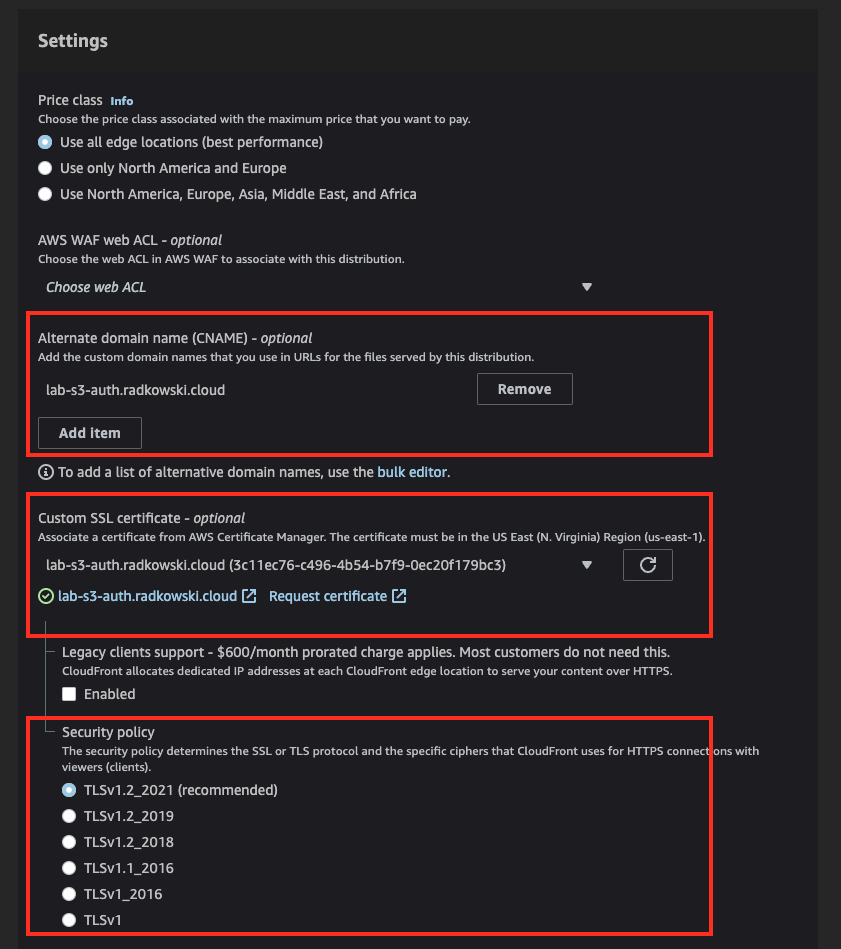
Config - Route53 (#2)
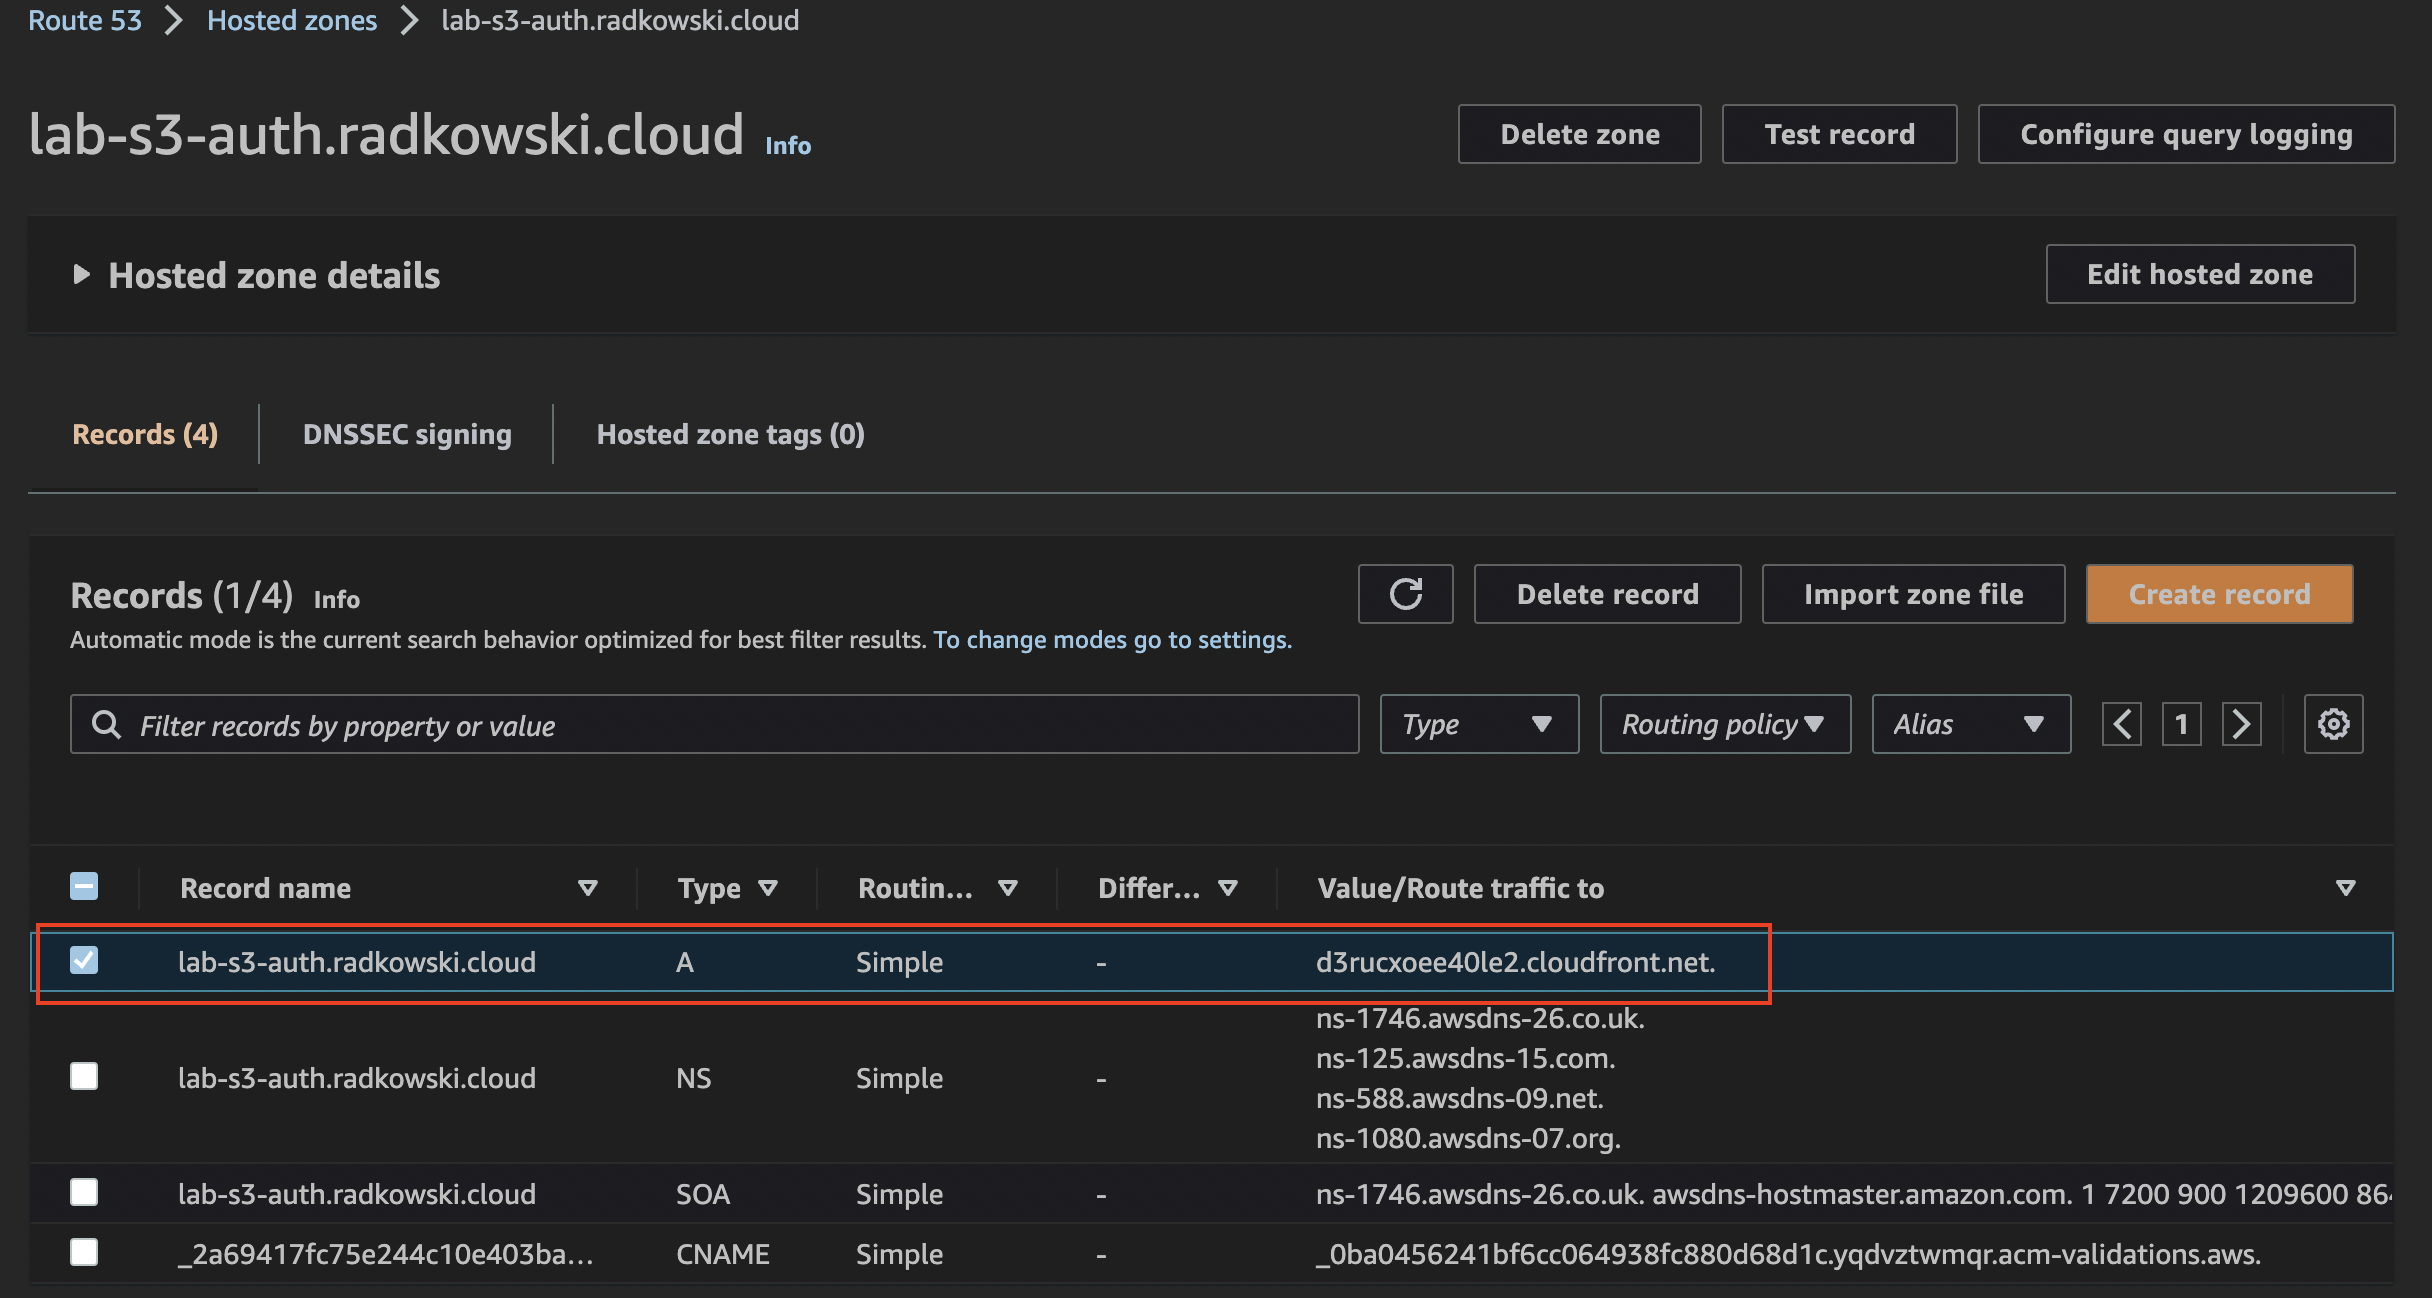
14.Update APEX record for pubic hosted zone
Come back to Route 53 Console, select previously created hosted zone, and create APEX record by creating an alias to CloudFront distribution created in step #12
Config - AzureAD
15. AzureAD application (#1)
Log in to Azure Portal and register a new web application.
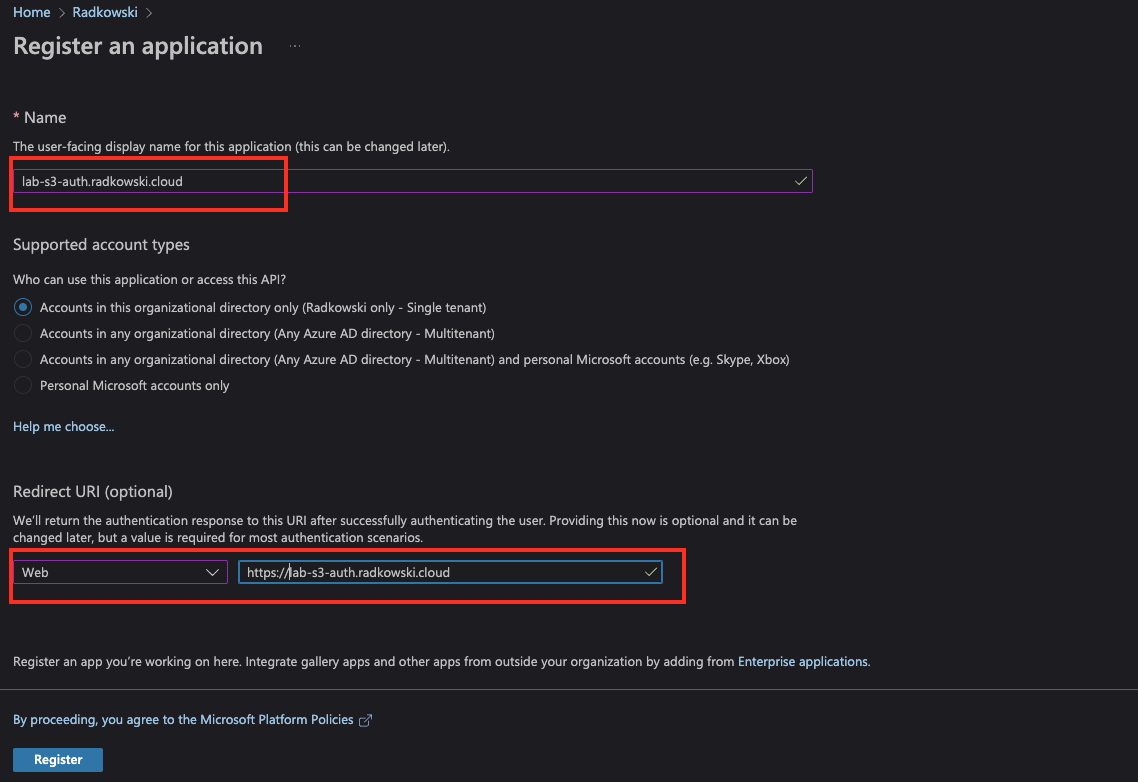
16. AzureAD application (#2)
Capture Directory (tenant) and Application (client) ID

17. AzureAD application (#3)
Using the Certificates and Secrets menu, create a new client secret. Set expiration time.
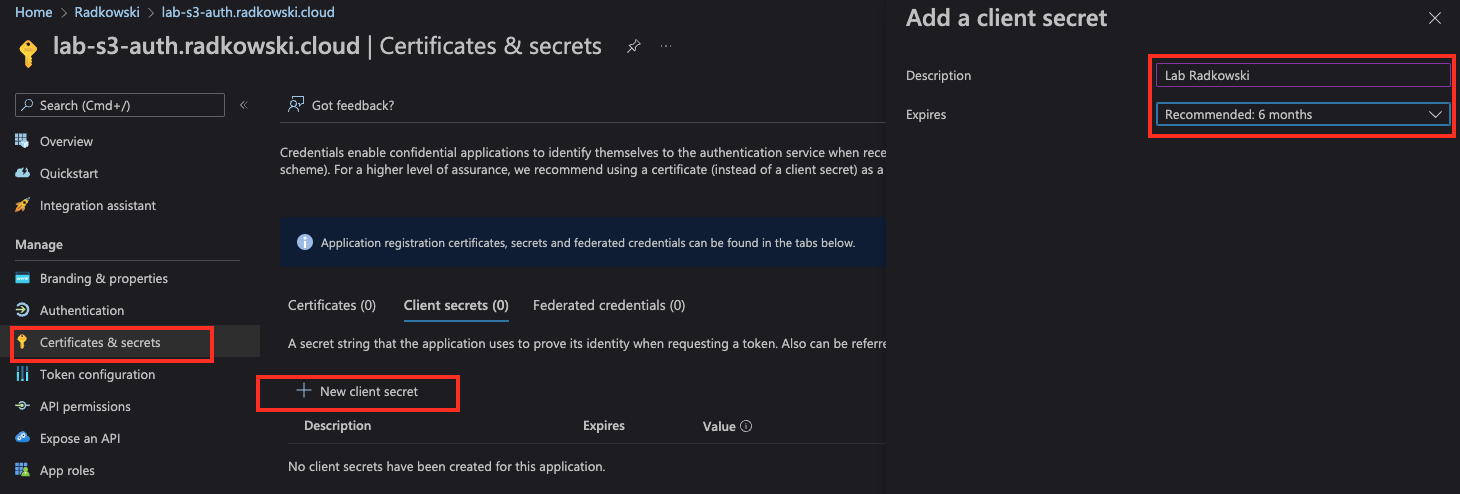
18. AzureAD application (#4)
Capture secret value

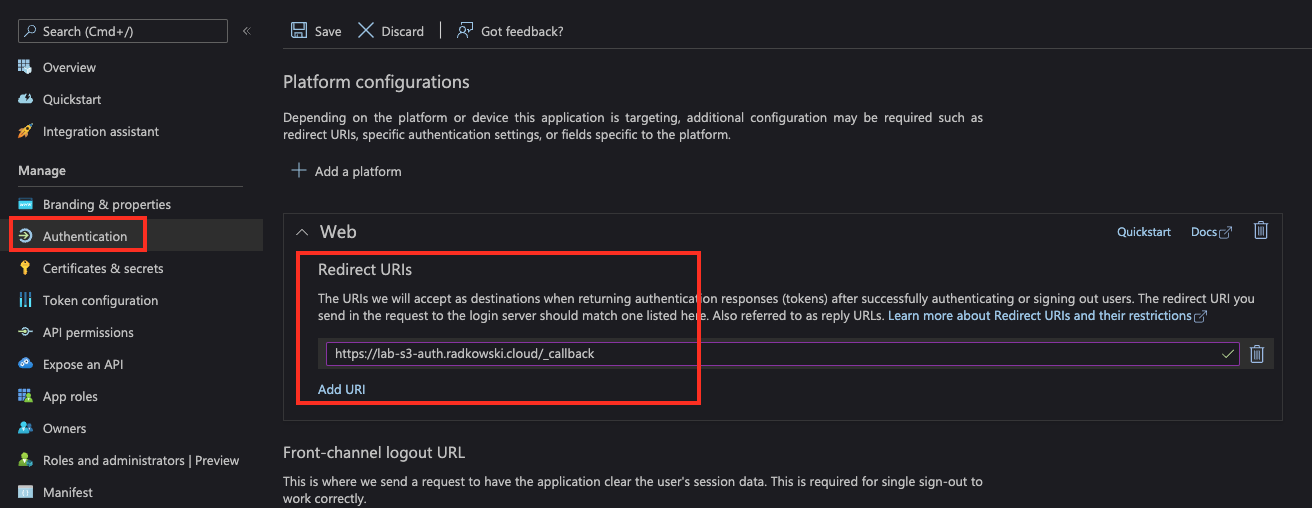
19. AzureAD application (#5)
Using Authentication menu, update Redirect URI by entering https://lab-s3-auth.radkowski.cloud/_callback
Config - Lambda@Edge
20. Lambda@Edge Deployment (#1)
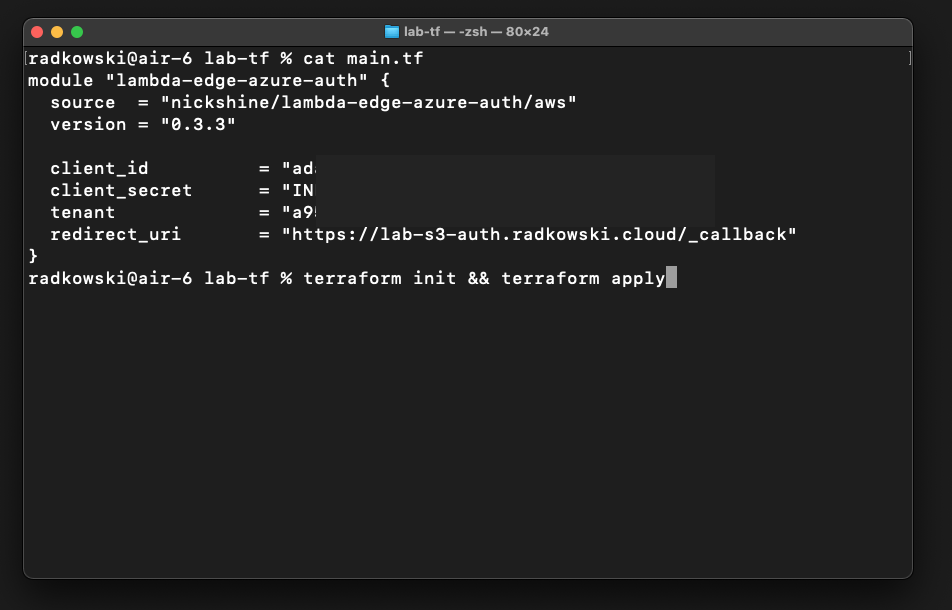
Create lambda-edge-azure-auth directory and save info it main.tf file. Copy code from the template on the right
module "lambda-edge-azure-auth" {
  source  = "nickshine/lambda-edge-azure-auth/aws"
  version = "0.3.3"

  client_id          = "xxxxxxxx-xxxx-xxxx-xxxx-xxxxxxxxxxxx"
  client_secret      = "yyyyyyyyyyyyyyyyyyyyyyyyyyyyyyyyyyyyy"
  tenant             = "zzzzzzzz-zzzz-zzzz-zzzz-zzzzzzzzzzzz"
  redirect_uri       = "https://lab-s3-auth.radkowski.cloud/_callback"
}
21. Lambda@Edge Deployment (#2)
Authenticate against AWS account (using programmatic keys, AWS SSO etc). Update template by providing data captured in previous steps:
- client ID
- client secret
- tenant ID
- redirect URI
Initialise and execute terraform script using: terraform init && terraform apply
22. Lambda@Edge Deployment (#3)
Go to Lambda console, confirm if lambda-edge-azure-auth function has been created

23. Lambda@Edge Deployment (#4)
Check latest function version and copy ARN

Config - CloudFront (#2)
24. Update CloudFront behaviour (#1)
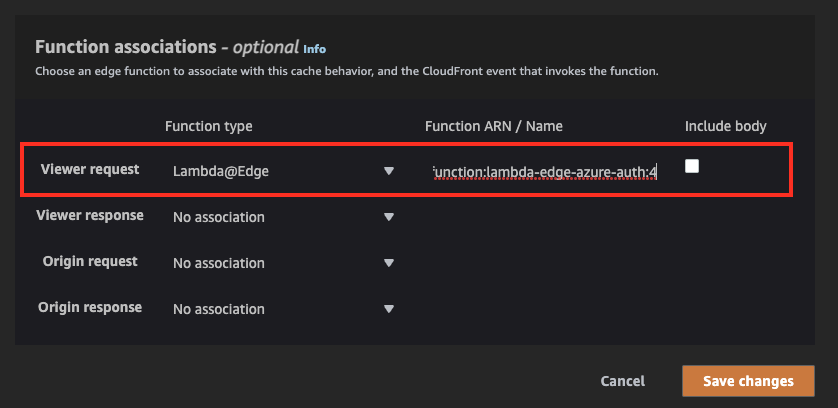
Come back to CloudFront Console, select previously created distribution and edit behaviour settings

25. Update CloudFront behaviour (#2)
Update viewer request by entering lambda ARN captured in step #23
Test Area
26. Test access to S3 (#1)
Open the new/fresh browser tab and enter https://lab-s3-auth.radkowski.cloud You should be automatically redirected to AzureAD

27. Test access to S3 (#2)
Enter proper credentials, confirm MFA and enjoy content uploaded to S3 bucket in step #2

